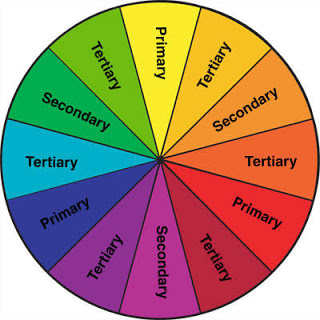
Some very simple color tricks can help to make the color of your eyes pop and can also help with concealing!
So, what color eyeshadows will bring out your eye color?
Eyecolor:
If you have
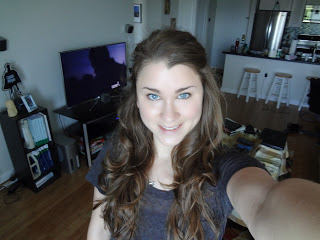
BLUE eyes: The direct complement of blue on the color wheel is orange. Orange based eyeshadows will help to make your blue eyes stand out. This does not mean you have to go out and buy orange eyeshadows (you will not see many of those because orange eyeshadows are pretty ugly). More of an approachable color that will work just as well is brown. Browns and bronzey colors will do wonders for your blue eyes, especially when they have warm, orange undertones.
If you have
GREEN eyes: The direct complement of green is red. Similarly to orange eyeshadows, red eyeshadows would be a bit scary. To make green eyes pop you want to go for rich, deep purples. Colors that are a mix between purple and red (try Cranberry by MAC) will also work very well!
If you have
BROWN eyes: Brown is a tricky one because there is no brown on the color wheel. However, I have found that navy blue makes brown eyes pop so nicely. Brown eyes will also be enhanced with black and dark purples.
If you have
HAZEL eyes: Hazel eyes are another tricky one because there are so many different colors that come with hazel eyes, brown, green, yellow. What colors you wear depends on what colors you want to enhance. I think the best colors for making hazel eyes pop are dusty rose type colors- deep pinks and purples. Purple is the direct complement of yellow, so purple will make the yellow in hazel eyes look gorgeous.
Concealing:
Information about colors can be extremely useful when concealing!
If you have unwanted redness, blemishes, Rosacea: Go for a green concealer (which they do sell, try Make Up Forever concealer palette or Coastal Scents colored concealer palette) or a green based primer (Smashbox sells this). The green does wonders for neutralizing redness!
If you have blueish dark circles: If you look at the circles under your eyes, they will look more blue or more purple (for a reference mine are more purple). If your circles are more blue, find a yellow based concealer.
If you have purpleish dark cirlces: If your circles have more of a purple look, find a more orange based concealer.
 Some very simple color tricks can help to make the color of your eyes pop and can also help with concealing!
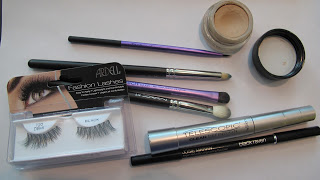
 Individual false lashes can be a great way to bulk up your lashes with a bit more of a natural look. You can use the longer ones on the ends and the shorter ones throughout the middle to add volume and length. To use them you simply take a tiny dab of DUO glue and place the false lash at the root of your natural lashes. Just let it sit there for a moment and it will dry and stay for as long as you need! The great thing about DUO is that you only need a tiny amount and it holds the lash on incredibly well. These do take longer than normal strip lashes to apply because you have to do each one individually. You can grab these individual lash packs at any drugstore for a cheap price or you can get nicer ones at MAC or Sephora. I like to get the cheap ones because then you can just toss them out after you wear them :-). If you want to explore with false lashes but haven't mastered the strip ones yet, I would give these a try! Enjoy!
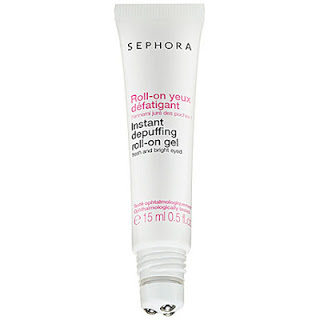 I have tried all kinds of different products to reduce under-eye puffiness and darkness from gels to creams to anti-dark circle eye rollers. Some of these products have been expensive and others have been drugstore. They all do a little something, but not really enough to notice a big difference. Most of us do not get enough sleep and our eyes definitely give us away! A lot of people just have puffiness right when they get up and it gradually fades. My eye problems are, unfortunately, hereditary which means no matter what I do they will always be there to some extent. After trying all sorts of different products, I resorted to a cold spoon under each eye every morning. This was time consuming, but it was effective until I found my new favorite product. It is the Sephora Instant Depuffing roll on gel. It is the same concept as the eye rollers I have used before, but it actually works! This gel contains ingredients that moisturize, brighten and reduce puffiness. I have a very sensitive eye area and many other products I have tried have been irritating, stung, even caused little bumps to form. This product has not had any negative side effects! I put a small amount on in the morning and pat it in gently so it absorbs quickly. I then put a moisturizing eye cream over the top (my eye area also gets very dry). I think that splashing cold water on my face after washing it in the morning has also helped to reduce the excess fluids that build up in our faces over night. This product is only $15.00, which is totally worth it in my opinion, and can be found at your local Sephora or online! Different products were for different people, just because it worked for me does not mean it will be effective for you. But from someone who has tried TONS of under-eye products, this one has been the best so far!