Thursday, January 31, 2013
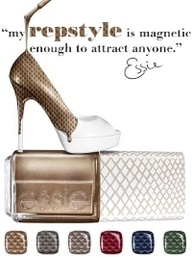
Essie Snakeskin Magnetics
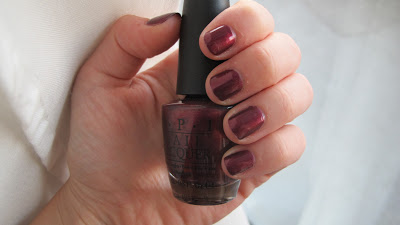
I have been seeing this Essie Snakeskin magnetic nail polish for a while now but never had the urge to buy it until recently. I have never used a magnetic nail polish, so I had high hopes that it would create a cool and different effect. Well, all in all, I was super disappointed. First off, the magnet is on the cap of the nail polish bottle, and its kind of difficult to hold it close to the nail without nicking the wet polish and messing it up. When you do get it close enough, it barely works. On some nails it didn't even work at all, where as on others it created the snakeskin effect but only on one strip down the center of the nail, not on either side. If this worked, I think it would be so cool because the small amount that turned out well looked really neat, almost 3-dimensional. But unfortunately it was way too hit or miss- very disappointing especially for an Essie product that was around $10! The only redeeming quality about this polish is that the color is decent, I got Lil' Boa Peep, which is chrome color with brownish undertones. Its a nice color, but its not one I would have picked up if it didn't have the special effect. I left one nail done with the snakeskin so you could see, but I painted over the rest!
Tuesday, January 29, 2013
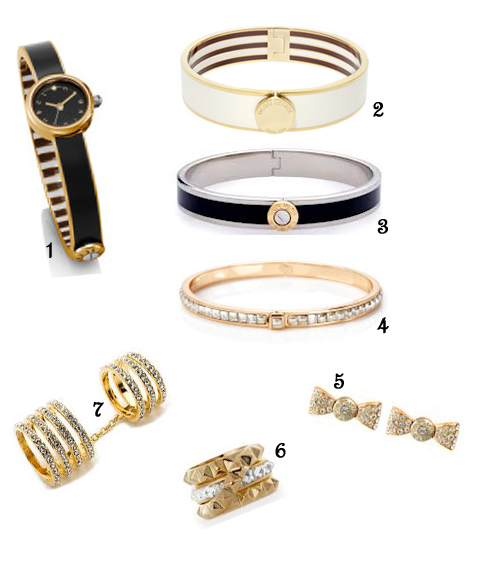
Henri Bendel: Gold and Black
I absolutely LOVE Henri Bendel jewelry! The black and gold watch is especially fabulous :-)
Monday, January 28, 2013
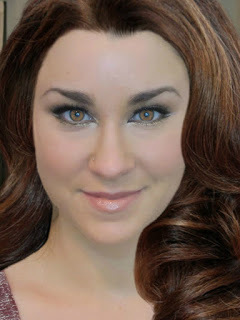
Arabian Inspired Makeup
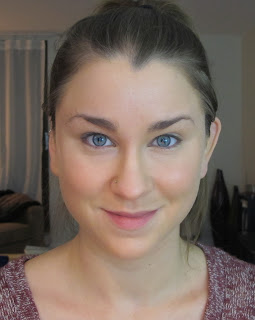
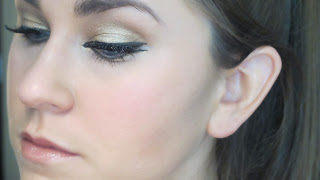
This started out as a J-Lo inspired makeup, but it ended up looking more like something Cleopatra would wear, so we'll call it Arabian :-)
I had fun with some digitized hair and eye color to try and look more Arabian!
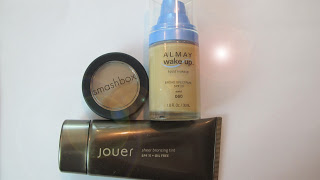
I wanted a more bronzed skin effect
so I used Jouer Sheer Bronzing Tint and a foundation
a couple shades darker than my skin tone.
Also load up the bronzer for this look!
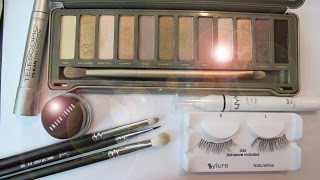
Apply a gold eyeshadow all over the lid and along the lower lash line
Apply a darker bronze shadow through the crease
and into the inner corner of the eye
Have fun with the eyeliner!
To create an Arabian effect, bring the eyeliner to a point at the inner corner
Creating two wings instead of one is a fun and
different way to make your eyeliner a bit more interesting!
Make it glamorous with false lashes!
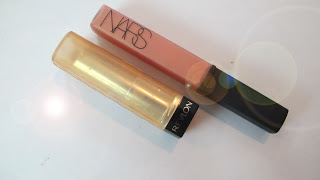
I chose a pinky-nude lip color with golden shimmer
Your makeup is finito!
I have been having way too much fun with this
makeup program lately. It looks so real!
I kind of wish my eyes were really this color!
Hope you enjoyed!
Products I used:
Smashbox matte bronzer
Jouer Sheer Bronzing Tint
Almay Wake up foundation in 060 Sand
Urban Decay Naked 2 palette: Half Baked, Bootycall, Snake Bite
Bobbi Brown gel eyeliner in Black Ink
NYX Jumbo Eye Pencil in Milk
Eylure lashes
L'Oreal Telescopic mascara in Black
MAC 217, 219, 209
NARS lip gloss in Orgasm
Revlon Lip Butter in Creme Brulee
Friday, January 25, 2013
NEW! Revlon Ultimate Suede Lipsticks
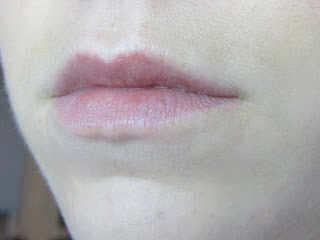
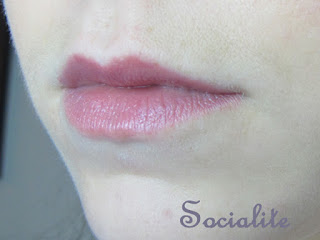
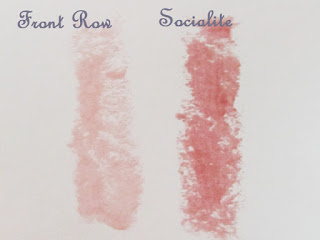
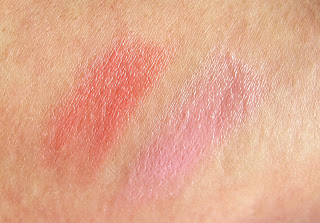
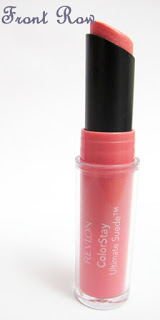 The Ultimate Suede lipsticks are the newest out from Revlon. As you know, I am more than game for always trying new things (much to the dismay of my bank account), so of course I chose a color to try out. What attracted me to these lipsticks was the advertised matte finish and long-wearing power. I really love matte lipsticks in general, but especially for everyday wear. I love lip glosses as well but I feel like they look slightly less professional for work. I am constantly on the hunt for the perfect "everyday" lip color that lasts and doesn't rub off on your coffee cup or water bottle, so this line seemed to be an appropriate experiment. I picked up the color Socialite and was immediately super happy with the color. It turned out to be the exact every day color I had been looking for. It is very close to the color of my natural lips but with a slightly pinker tinge, which is great because I feel that pink lipsticks brighten up the overall complexion. It goes on smoothly and dries completely matte. Once it's dry, it absolutely does not rub off on anything, which is so fantastic! It is close to the Revlon Lip Stain and Balms except more matte and less hydrating. I liked it soo much I went out and got a brighter pink color (Front Row) which is also excellent for everyday wear.
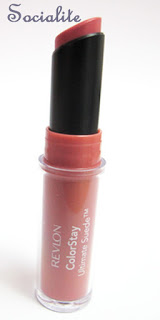 The biggest problem with this lipstick, which is the same problem most matte lipsticks have, is that it dries out your lips. If you have dry patches to begin with, these lipsticks will highlight those and likely make them worse. I would recommend exfoliating your lips with a sugar scrub and applying lots of Aquaphor or some other really hydrating lip treatment to prevent added dryness, especially this time of the year. Although this lipstick is great about not rubbing off, the long-wearing power of it is compromised by how drying it is. It can tend to get a bit patchy and unsightly; applying a clear balm over top helps reduce the dryness. Re-application can also be tough because the second coat may cling to the dry patches caused by the original coat! I think this would be much less of a problem if it wasn't 0 degrees outside! Lastly, once the lipstick dries it does feel a bit sticky and tacky. This is how a lot of long-wearing type lipsticks are though, it doesn't bother me but it make be annoying for some people.
Overall, I am so pleased with this recent release from Revlon. It is a close runner up to the beloved lip stain and balms and the color range is great for everyday wear and for nights out. It also stays on your lips and does not rub off on coffee cups or anything else! The biggest issue with this lipstick is the drying effect it has on the lips. Have you purchased any of these lipsticks?!
Nothing on
Tuesday, January 22, 2013
Revlon Photoready Concealer Review!
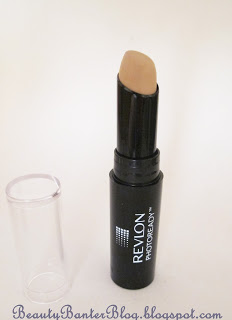 I spied this new Revlon concealer at Rite Aid and had an inclination to buy it. I don't think its new but for some reason it was pretty predominantly displayed which is why it caught my eye. I already have a great under-eye concealer (maybelline dream lumi touch) but I don't have a blemish concealer to speak of, so I thought I would give this one a go. I expect most stick concealers to be dry and difficult to blend, so I was happily surprised at how creamy this formula is. It goes on smoothly and blends well and can be used on dark circles as well as blemishes. Although it does a decent job with blemishes, like most concealers it can highlight dry, healing spots- I do feel it is one of the better drug store concealers though. The packaging of this product is unique in that the product clicks up when you turn the bottom. It clicks the first few times and then smoothly rolls up the rest of the way, kind of like a liquid concealer but in stick form. Revlon is using this clicking feature with their new lipsticks as well. I kind of like it but it isn't a necessity by any means. Other than the clicking, this packaging isn't anything special. The Photoready technology is meant to diffuse and reflect light, creating flawless skin in pictures. So this could be a good concealer to use when your going out for a night and know that someone will be snapping shots. Lastly, the color range isn't spectacular with just 6 colors- I chose 002 "light" and it seems to be a good match for me. This concealer retails for a somewhat pricey $8.99 but there have been all kinds of sales on Revlon products lately!
Overall, I am happy with this concealer and I think its probably the best drugstore stick concealer I have tried. However, you might be disappointed by the color range and the fact that its a bit pricey for drugstore. Do you have any "go to" concealers?!
Sunday, January 20, 2013
Easy Bronze and Blue Eyemakeup
Step 1: Apply Maybelline Color Tattoo in Bad to the Bronze
all over the lid and heavily on the lower lash-line
Step 2: Smudge a dark blue eyeliner along the upper lash-line
and onto the outside 3rd of the lower lash-line
Step 3: Use the same blue eyeliner to line your lower water line
Step 4: Buff a matte bronzer onto the outer edges of the Color Tattoo
This will help blend out the edges and create more dimension
Bronzer is a great to use when your want to blend your makeup to make it look more natural
Step 5: Apply mascara to the upper and lower lashes
You're finished!
Maybelline Color Tattoo in Bad to the Bronze
Clinique Quickliner for Eyes Intense in Intense Midnight
Smashbox Bronzer in Suntan Matte
L'Oreal Telescopic Mascara in Blackest Black
Real Techniques Shading Brush
MAC 217 brush
Thursday, January 17, 2013
Quick Post: De-Clog your Hairspray
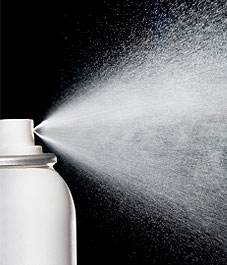
You pick up your hairspray one day and all of the sudden it is shooting out in ten different directions or not at all! If you have been a victim of evil nozzle-clogging try rinsing it under warm or hot water for several seconds!
Tuesday, January 15, 2013
Urban Decay Naked Skin BB cream: Review and Application
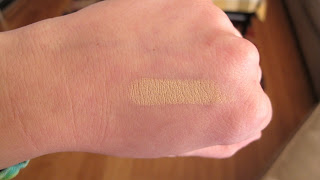
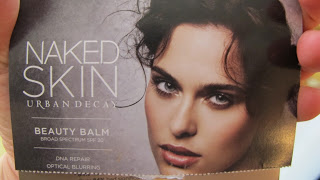
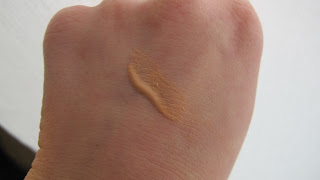
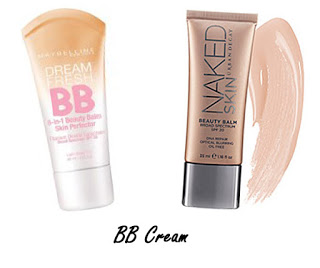
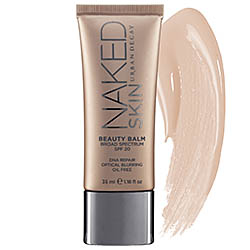 As a confessed sample fiend, I was very pleased to receive a sample of the new Urban Decay BB cream with my Anastasia brow wax kit! Urban Decay has done its darndest to capitalize off of the fame of their Naked eye shadow kits by releasing Naked foundation, nail polish and now a BB cream. Unfortunately I wasn't as impressed with the BB cream as I have been with everything else from this line. I am a huge fan of the Maybelline BB cream, so I was expecting a much more expensive BB cream would be much more effective! Its a nice product, there's no doubt about that, but, in my opinion it isn't great enough to splurge on . It has about the same amount of coverage as the drug store one and they both feel light on the skin. They also both claim to improve the skin with wear. Interestingly, there are 3 shades for the Maybelline product but only one for UD. I guess it simplifies things? I found that the UD one blended fine, but may have been slightly dark for very, very light skin. but The one perk that the UD BB cream has over the Maybelline one is that it has anti-aging properties. UD Naked Skin BB cream retails for $34. The video shows an application of the product with my first impressions!
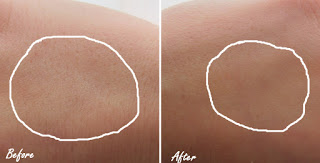
You can see the "blurring" effect here
Sunday, January 13, 2013
Anastasia Pro Wax Kit Review
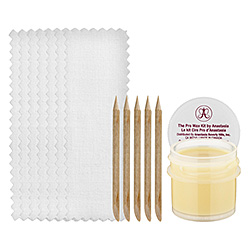 Before moving to Boston I religiously got my eyebrows waxed with my long time hair stylist. I could go and depend on her to get my eyebrows in tip top shape every time. After I moved I went to a few different places searching for someone that could replace her. It seemed like each place I tried was worse than the last, even the "spa" places! One time I left with about an inch off the end of my eyebrow! I just wasn't getting the kind of results I wanted so I decided to switch completely to tweezing myself. Many people have suggested threading, but there is no way I could sit through it. I am sooo sensitive even to waxing that I think threading would be complete torture. Tweezing had been working o.k. for underneath but I have a really hard time with the center "uni-brow" area. The hairs are so fine in that area that is hard to see them well enough to get a clean tweeze. So I decided to try a Sally Hansen home wax kit. I didn't love this kit because it came with the type of wax that hardens and then you pull the actual wax off, no strips, which isn't my favorite. It helped with the uni-brow but I only used it once or twice before abandoning it.
I have been eyeing the Anastasia Pro Wax Kit for a while and finally decided to give it a go. Anastasia is widely known to be a famous eye brow artist to the stars so I thought this may be a safe bet! Well, I have very mixed feelings about this kit. One great thing is that the directions are very simple and easy to follow. Just heat the wax, apply the muslin strip and pull off. The wax is a creamy solution v.s. a clear type of wax, which I also liked- it felt more luxurious. The fact that it came with strips and wasn't the hardening, pull-off wax was a huge plus as well. A major downfall of this kit was that it was extremely messy. I felt like I had wax all over me by the end and felt so sticky. It also does not come with a wax remover or soothing cream like the Sally Hansen kit does. So you are kind of left with all this leftover wax on your face and no way to get it off- I had to resort to olive oil!! The wax "stretches" when you bring it out of the tub, so you have these strings of wax attaching to your eyelashes, hair and just about everything else! I also had little pieces of the muslin everywhere! During this whole escapade my boyfriend was just chilling on the couch watching football, not even blinking an eye. He must be used to the antics of a beauty blogger by this point hahah! Anyways, besides all the mess, the wax gets decent results. I had to take two passes at each eyebrow to get most of the hair, and then go in with tweezers after for the stragglers. It worked fantastically for the uni-brow though, one pass and everything was gone pretty much. I had high hopes for this kit but in the end it is only slightly better than the Sally Hansen one, and probably not worth it. I will probably use it again because I have it and it works great for the middle brow area, but it hasn't become the waxing solution I had expected. Has anyone tried this kit or any other type of kit that has worked well?
A recap
Pros:
-Easy directions
-Reasonably priced ($15)
-High quality wax
-Use of strips instead of hardening wax
-Decent results
Cons:
-Messy, wax everywhere!
-No soothing or wax removing solution included
-Had to take 2 passes to get decent results
 |
| After 2 passes |
Wednesday, January 9, 2013
How To: Opaque Glitter Nails
It's so often the case that you spy a sparkling nail polish that looks like it's packed with glitter, but you get it home and realize that each swipe delivers hardly any glitter pieces. Sometimes this is great and all you want is a light glitter top coat, but other times you want the hardcore version, opaque glitter nails! Here is how I create that solid glitter look with one of those nail polishes that doesn't produce a lot of glitter per swipe. Enjoy!
Tuesday, January 8, 2013
5 Step festive eye makeup!
Step 1: Apply a very shimmery light eye shadow all over the lid and in the tear duct area
L'Oreal Infallible eye shadow in Iced Latte
Step 2: Apply a shimmery purple shade to the outer corner of the eye and through the crease. Sweep the color inward to blend with the original color.
Urban Decay eye shadow in Vice
Step 3: Take the same purple eye shadow and apply it to the outer corner of the bottom lash-line
Urban Decay eye shadow in Vice
Step 4: Crease a winged-out line with black liquid or gel liner along the upper lash-line
Covergirl LineExact Liquid Liner in Black
Step 5: Trace over the black line with a sparkly liquid liner
Tarina Tarantino Glitter Liner in Black Diamond
Apply Mascara and your done!
Sunday, January 6, 2013
Saturday, January 5, 2013
The Makeup Beginner's Starter Kit Suggestions
If you are brand new to makeup, it can be overwhelming trying to decide what to buy first! There are SO many options out there and making "blind" purchases can end very badly. I have been dabbling in makeup for quite some time now and I have tried tons of different products. I also stay very up to date on what people are liking in the "beauty world" in terms of both high end and drug store products. I put together a list of products that I think are really safe bets for the makeup beginner. Purchasing just a few key items can help ease the transition from wearing no makeup to wearing makeup. I tried to choose "fuss-free" products that don't require a lot of practice to apply. I also made sure almost everything is very affordable. Here they are, hope this helps and please leave your thoughts in the comments section!
Face
Maybelline Dream Fresh BB Cream
If you are not used to putting something on your face, skipping right to a full-fledged foundation may feel really weird and heavy, like you are wearing a mask. I think a BB cream is a great product to help get you used to the feeling of wearing foundation. The coverage is heavier than a tinted moisturizer but much lighter than a foundation, so you don't have to worry about getting the color exactly right. This is also a drug store brand so you won't be spending a ton of money!
Maybelline Dream Lumi Touch Concealer
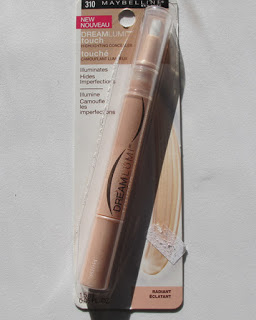
Anyone who follows my blog is well aware that I LOVE this concealer, especially for dark under-eye circles. I have tried a myriad of concealers, drug store and high-end and have yet to find one as effective as this for the cost. Because I have tried so many, I can recommend this product to any makeup beginner with absolute confidence.
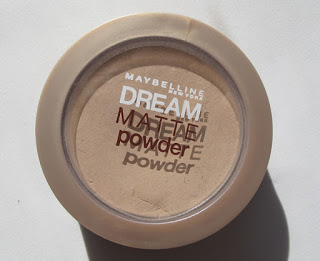
Maybelline Dream Matte Powder
I did not even realize I chose all Maybelline products until just now! This is an optional one for the makeup beginner. However, it can be really effective for reducing shine and keeping concealer and anything else you use on your face in place. It is also translucent, so you don't have to worry about matching the color. I use this product personally and find that it works really well. I have also heard good things about the Rimmel Stay Matte Pressed powder.
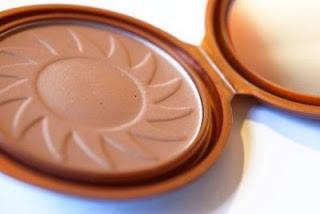
NYC Smooth Skin Bronzing Face Powder
I don't use this bronzer personally, but I have read a lot of great things about it. Its matte and creates a subtle bronze without leaving the skin orangey looking. This will help it look more natural Its also extremely affordable at under $3. This is a great bronzer to try for the makeup beginner.
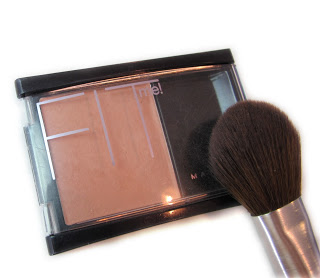
Maybelline Fit Me Blush
Another Maybelline product! I chose this blush because of how subtle it is. It's not one of those blushes that you touch the brush to your face and your instantly transformed into a clown. You can basically load this on and not get a huge amount of color. This can be a downfall, but it is actually a huge plus for the makeup beginner because you can start with a very subtle color and build it as you become more comfortable.
Eyes
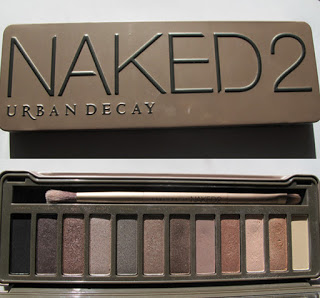
Naked 2 Urban Decay Eyeshadow Palette
This is the only expensive item that I included in this "beginner's kit."I included it because I think it is the perfect makeup palette for someone just starting out with makeup. The quality of the eye shadows are great and everything comes in one, cohesive package. You get a bunch of neutral, everyday type colors, which are most likely what a makeup beginner will wear the most (unless you go directly to electric blue which is fine too ;-) ). This palette will last you forever and it also comes with a high quality brush that I actually use all the time!
Maybelline Color Tattoo in Barely Beige
I swear I am not endorsed by Maybelline, ha ha! I chose to include this because it is super quick and easy for a busy morning. This will create a really sheer, subtle shimmer on your eye lid and is made to last all day (although it usually creases after a few hours for me). This can also work well as a base for other eye shadows.
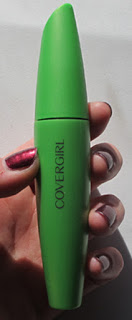
Covergirl Clump Crusher Mascara
This is a great mascara because it creates length and volume with zero clumping. You won't have to work and work to achieve great looking lashes- the brush makes it totally fool proof.
Lips
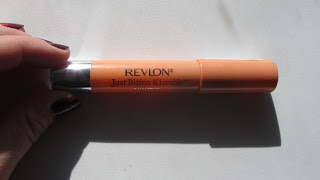
Revlon Just Bitten Kissable Lip Stain & Balm in Charm
This is the perfect lip product for the makeup beginner because it isn't something that needs frequent re-application and attention. Its a stain but does not leave your lips feeling dry, so it wears great all day and you will probably forget your wearing it at all! This is also a very subtle pinkish color that will look pretty natural. Overall, its a low-maintenance lip product that is a must have for a beginner's collection.
Brushes
I absolutely love makeup brushes because I find them so important in creating the looks I want. However, for someone that is just starting to dabble in makeup, nice brushes are not necessary just yet. You could easily start with an inexpensive set from the drugstore such as Essence of Beauty brushes or EcoTools. You can also get a slightly upgraded set for not a lot more from Sigma Beauty or Real Techniques.
Subscribe to:
Posts (Atom)


