Thursday, August 30, 2012

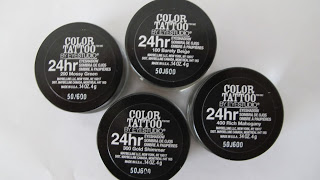
NEW! LIMITED EDITION MAYBELLINE COLOR TATTOOS

*Barely Beige is now added to my collection for the 10,000 view giveaway!! :-)*

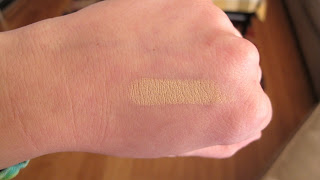
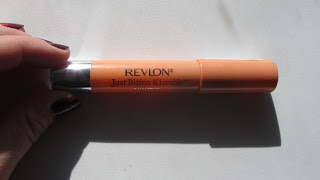
The moment I found out about Maybelline's Fall 2012 release of a set of limited edition color tattoos I made it my mission in life to get all of them. I tend to get a little obsessive over certain things and it becomes a pre-occupation until I get whatever the item is. It could be a certain item of clothing, makeup, electronic, food item...it could really be anything. If I want it bad enough I will search and search until I find it, my Dad tells me he is the same way so I guess I know where I got it from. And waiting for this desired item is the enemy because who wants to wait for anything they want!!! haha ;-). After days upon days of searching- I finally achieved victory by finding each of the 4 new colors. I'm not gonna lie, it took visits to multiple different CVS locations on multiple different days- yes it's sick.  Anywaysss, onto the product. I was so enthralled with these colors because they were neutral and wearable- exactly what the core color tattoo collection was lacking. The limited edition colors include a dark green, a dark brown, a deep gold shimmer and....the star of the show...a shimmery beige!!!! The best everyday color you could imagine. Of course, the shimmery beige was the most difficult one to find. It is sold out absolutely everywhere! Due to the popularity of this color I am guessing they will consider making it part of their permanent collection. Somewhat of a disappointment though- I wore Barely Beige to my internship today and it was creasing by lunchtime. Basically this product needs to last from 7am to 2:30pm and it just didn't live up to the task. I could understand if it was really hot and humid in the building today, but it was perfectly ACed the whole day so I wasn't even sweating. Now, mind you, I wasn't wearing a primer, but you really shouldn't have to with these color tattoos. I am still in love with this color and will absolutely be wearing it a lot more, maybe I just put on a little to much? I'm not sure but I will certainly update after I have tried some different ways of wearing it. I haven't worn the other colors yet because I was so excited to make this post I didn't want to wait until I got to experiment with all of them. I think you could live without the green, brown and gold, but if you see the beige shimmer, definitely grab it. Especially if you don't want to spend a lot of time on your makeup in the morning, you can just throw it on with your finger and go! These retail for around $7 a pop, but CVS often has sales and if you use your CVS card you probably have a coupon with Extra Bucks (I save all my coupons and use them all the time!) I have only seen these at CVS's, not Rite Aids, Targets or Walgreens. I have heard through the grapevine that Maybelline has also released a limited edition line of "jewel toned" color tattoos. I am not quite as excited about these as to me they seem quite similar to the colors already in their collection-and they aren't as wearable for everyday. Enjoy the pictures below and please don't hesitate to leave a comment or question about these products, I answer quickly :-)! xx
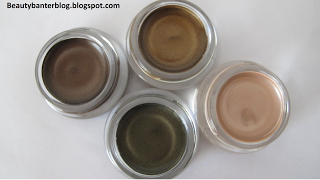

Left: Rich Mahogany
Top: Gold Shimmer
Bottom: Mossy Green
Right: Barely Beige
From Left: Mossy Green, Gold Shimmer, Barely Beige, Rich Mahogany


Wednesday, August 29, 2012

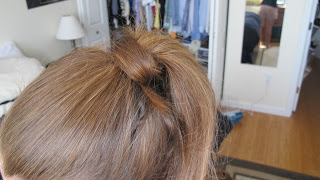
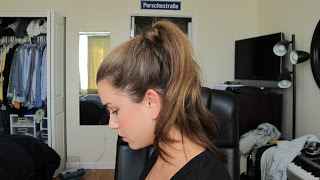
Busy Morning Hair:Updated Ponytail


Tuesday, August 28, 2012

Maybelline Eye Studio: Olive Martini Review + Swatches

These are great little palettes to add to your collection. The colors are already paired up for you so all you have to do is put them together in a way that suits your liking. This particular one is part of the Maybelline Fall 2012 collection, and the colors are so eye catching and perfect for the upcoming season. I saw this one on display at CVS and decided to purchase it because I had a $5 off coupon- I think these are insanely overpriced at almost $11, so without the coupon I would probably not have picked this up. That being said, I am really in love with the colors. The palette is part of the Color Plush Silk eyeshadow line, so they have a very unique, soft texture. This makes them easy to apply and blend. I have a few other palettes in this collection that have amazing color payoff, but for some reason the pigmentation in this particular one is not quite as impressive. The two darker colors come out strong right away, but the two lighter colors need several coats to build up the pigment. When I was trying this palette out, I really wanted the light blue to pop in the inner part of the eye. It took several coats to even get a slight color payoff and it still wasn't as strong as I wanted. Regardless though it is still a really nice color, just very subtle. The real star of this palette is the 3rd color, a duo-chrome browny-blue with shimmer. It is a very interesting color that I haven't come across before, and I think it will be really lovely for the Fall season. All in all, I am really happy with this purchase because of the great colors. The color payoff of the lighter shades may not be superb, but these colors look really nice together and are very wearable for day or night. Maybelline has produced tons of these palettes in every color you can imagine, so they are a great drug store find- at $11 they are still significantly cheaper than high end palettes. Hope you guys enjoyed this review, please let me know what you think of the palette!! xx

Olive Martini


1st color all over the lid
2nd color inner corner
3rd color all over rest of lid
4th color in outer corner and lower lashline


Monday, August 27, 2012

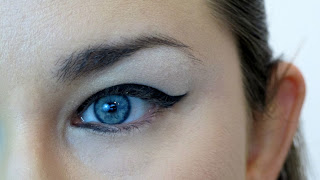
Mint and Berry Makeup Tutorial


Products Used:
-Almay Wake Up Foundation: will update color later today :-)
-Bobbi Brown Corrector: Light Bisque
-Bobbi Brown powder: Pale Yellow
-Stila eyeshadow: Cha Cha
-Maybelline Luminous Lights eyeshadow palette: Opal Lights
-Clinique Quickliner for eyes Intense eyeliner: Intense Midnight
-Stila Convertable Color cream blush: Peony
-Benefit: Watts Up
-Revlon Lip Stain and Balm: Lovesick (blog post on these here)
-Maybelline lip gloss: Clear

Brushes Used:
-Real Techniques: Expert Face brush
-Real Techniques: Shading brush
-Sigma: E20 Short Shader brush
-Real Techniques: Pointed Foundation brush
-Real Techniques: Detailer brush


Sunday, August 26, 2012

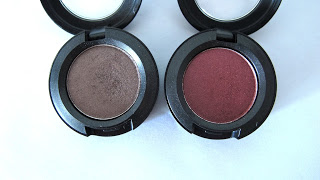
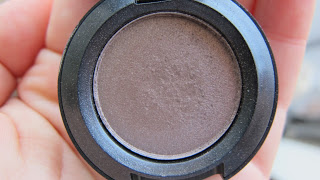
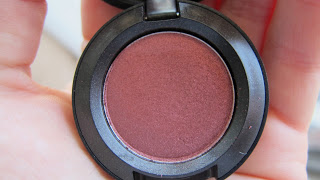
MAC Cranberry and Satin Taupe: Review + Swatches

I thought it would be a fun idea to review all of the MAC eyeshadows that I have collected over the years. The MAC eyeshadow formula is definitely one of the best out there, which is why they are so popular. The pigmentation is amazing and they have such a wide range of colors to choose from. They also release limited edition collections that have eyeshadows that are not part of their permanent collection. Once the collection sells out, the products are no longer sold-a great marketing scheme by MAC to make them that much more desirable!  I always find myself going to MAC when I want a fun new singular eyeshadow, it is hard not to collect them! But I have to contain myself because at $15 bucks a pop they are not cheap! Despite the price, they will last you years and years depending on how much you use them. I only have one MAC shadow that has hit pan and I bought it 5 or so years ago. I just picked the first two shadows at random: Cranberry and Satin Taupe. Both of these are very popular, especially Satin Taupe because it is incredibly wearable. They are both "Frosts", so they contain fine, light catching flecks that will produce a luminous, but not glittery finish.

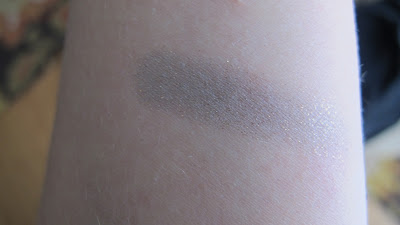
Satin Taupe: A shimmery gray-brown
Cranberry: A shimmery, rich, deep purpleish pink with orangey undertones

Satin Taupe-Cranberry


Cranberry-Satin Taupe

Satin Taupe

Cranberry

Thursday, August 23, 2012

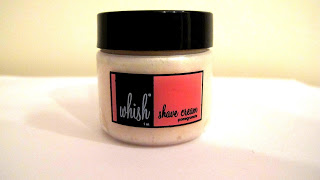
Quick Post: Whish Shave Cream

I received this little jar of shave cream in my August Birchbox along with a razor and I thought I might as well try it out. Typically I use the Venus Breeze razor with built in shave gel which I love because it is so convenient. But I figured since I had a brand new razor and this interesting shave cream I would give it a go. I was totally blown away by this shave cream. The first thing I noticed was the smell, it is absolutely intoxicating. I checked the website and it comes in Pomegranate and Almond, I have the Pomegranate one. I don't even really know how to describe the smell, but if I could fill up a bathtub with it and bath in it, I would! I spent at least 30 seconds just sitting there smelling it! This shave cream is thick but with a unique, foamy texture-making it stick to your legs while you shave. The greatest part though is that when you rinse the shave cream off, it leaves this wonderful, hydrating silky feeling on your skin. I have never used a shave cream like this, and I am totally in love with it. I am not sure it will be enough for me to abandon my Venus Breeze simply because I love the convenience, but I will certainly be using this shave cream until the last drop of my sample. If you are using shaving cream now, I HIGHLY encourage you to try this out...you can find it on the Birchbox website under August Box. I have been enjoying the razor that was in the box too, the Schick Hydro Silk. You get a really close shave but it's gentle and hydrating. Anyways, I felt compelled to make a quick post about this shave cream because it is simply fabulous, and so unexpected. Have a great night! xx


Wednesday, August 22, 2012

My current favorite ab exercises


DISCLAIMER:
-I am not a physical therapist, personal trainer or fitness expert and I have no formal training in the fitness arena
-I am not in any position to be "instructing" others. I am simply sharing exercises that I like that I find challenging
-I have not invented any of these moves on my own- Some are taken from Jillian Michaels, some are from my good old gymnastics days, and some are moves I have altered in various ways to suit what I want
-I chose to share these with you guys because I personally love learning new exercises that work for different people...maybe one of these will become one of your new favorites too!


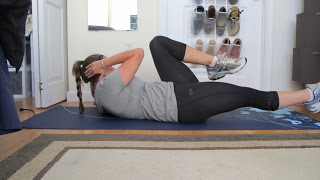
Move 1: Side Plank Curl
-Get into a side plank by raising your hips off the ground, supporting your body with the sides of your feet and your elbow
-Put the hand you aren't resting on behind your head and bring that elbow as far down as you can
-Repeat the process as many times as you can in 30 seconds or do 15-20 reps on each side and then repeat
-I feel this in my obliques, legs, shoulders and biceps. This exercise is great because you are working your abs while additionally using various muscles to stabilize yourself.


Move 2: Plank to Push Up
-Get into a plank position, resting on your elbows
-Press yourself up into a push up position and then lower yourself back to plank
-Make sure you keep your abs tight and your butt as low as you can, so you maintain a straight back
-I feel this in my abs, back, legs and arms. Keeping your body straight while using your arm muscles to raise yourself up and down is really tough! I can do about 15-20 of these before I collapse.


Move 3: Modified Bicycle
-Get on your back and put on leg out straight, 2-3 inches from the ground
-Bend the other leg and bring it up to meet the elbow on the opposite side (like in a regular bicycle)
-Instead of switching back and forth, continue with the same leg and arm for as many reps as you'd like and then switch to the other side
-I feel this in my abs and legs. I like it because you are forced to keep your leg off the ground, so that ads some difficulty to the move.


Move 4: Side Plank Arm Curl
-Get back up into a side plank, the same way you did with the first move
-Grab a weight, it doesn't matter how heavy. With light weights like 5lbs I will usually do as many as I can in 30 seconds. With a heavier weight (12.5lbs) I can typically get to 15-20 reps max on each side.
-Bend your arm and move the weight down and up
-This move is great because you are using ab and leg muscles to stabilize, but also working your arm muscles at the same time.


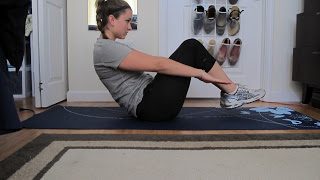
Move 5: V-Sit
-We've been doing V-sits since we were kids, this is the same idea!
-Balance on your butt with your legs bent and your arms out
-Stretch out your legs while simultaneously leaning your torso back, with straightened arms
-Again, we are using a lot of muscles to stabilize and remain balanced in a V position, while doing movements that strengthen abs and legs.


*I know those descriptions weren't great, it's surprisingly hard to describe and exercise move haha! The video definitely comes in handy here :-)
So those are my faves for the moment, but they change often as I discover new moves or get sick of them. Thanks for reading, please tell me if you liked this post- it is definitely different for my blog!! Have a great night! xx

Revlon Super Lustrous Lipstick-Matte Pink Pout: Review + Swatches

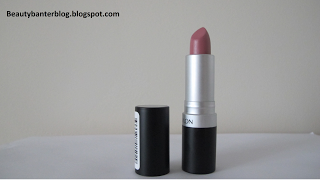
I am absolutely loving this lipstick from Revlon-enough to make an entire review dedicated to it! I picked it up at CVS on a whim, I hadn't planned on buying it, but I'm so glad I did! First off, this lipstick has great pigmentation for a drugstore brand. I have darker colored lips so drugstore brand lipsticks don't always have the color payoff I need. I was happily surprised that this lipstick shows up perfectly well on my lips. Next, the color is so pretty and unique. It is a mix between rose, light pink, mauve and nude! I think it appears a bit more blue in my picture than in real life, but nonetheless you get the general idea. It's interesting because the color of the lipstick itself looks very mauvey-brown, but when swatched, it transforms into a lighter pink. This color is designated as being matte, but unlike a lot of matte lipsticks, it doesn't dry out my lips and highlight dry patches. I love matte lipsticks, but I often avoid them because of how drying they can be. This lipstick feels moist and hydrating on the lips, while maintaining a shimmer-free finish. I also enjoy the packaging on this product. It is reminiscent of MAC's permanent line of lipsticks-very simple, but has the feel of high quality. Plus, you can see the actual lipstick out of a small window at the top, which is incredibly useful when picking a lipstick from a drugstore-the small color displays are almost never a completely accurate depiction of the lipstick color. I think this will turn out to be a well used lipstick, as it is very wearable for both professional and casual occasions. I have heard great things about Revlon lipsticks, and the are proving to live up to the their reputation! What's your favorite lipstick brand?? xxx


Tuesday, August 21, 2012

My Hair Care Products + Routine

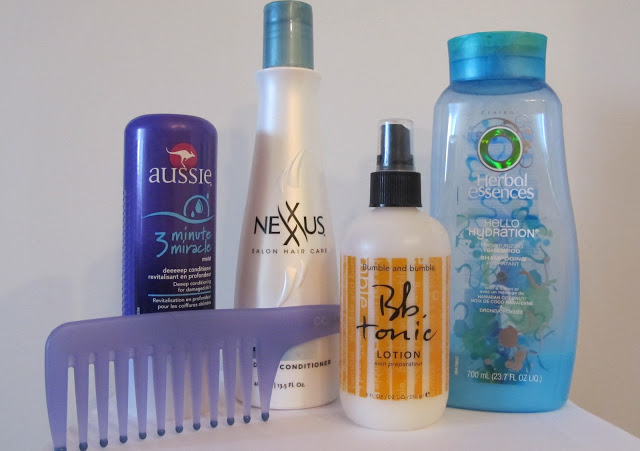
When it comes to hair, I think genes play a big role. There is absolutely no way to control how your hair grows naturally, but there are plenty of ways to modify your hair to make it closer to what you want. My hair is thick all together, but each individual strand is fine, so it is prone to breakage. A month or two ago I was noticing that I was experiencing a huge fly-away problem. It looked like I had been electrocuted! This is obviously something every girl tries to avoid, because flyways make even the most sleek hairstyle appear unkempt. I decided to try some different things to reduce those annoying little short strands.

The first thing I did was buy a wide toothed comb from the drug store. I had heard time and time again that you should always brush your hair with a wide toothed comb after a shower to reduce breakage, but regardless I was still using  my large paddle brush. Next I conveniently re-discovered a Bumble and Bumble de-tangling spray I had bought years ago. A detangler eases post-shower combing even more and puts less stress on the hair. So I began spraying my hair with detangler and combing it with a wide toothed comb. I have definitely seen an improvement even from these simple steps. The flyaways never disappear, but the breakage was noticeably reduced.

Of course, I was not satisfied with this one simple change and I had to find out what else I could do. I had heard a lot about the Aussie 3 Minute Miracle hair conditioner and decided to give it a go. It is incredibly inexpensive at just $3.99 and can be bought at any place that sells Aussie. I absolutely LOVE this product. Not only does it smell amazing, but it makes your hair feel like silk! You simply apply it after you shampoo your hair, leave it for 3 or more minutes (this is easily done...just shave-wash your face-wash your body, whatever else you need to do!) and then rinse it out. An important step to getting the most out of this product is making sure you rinse your hair with cool to cold water before you get out of the shower. I think that the shot of cold water helps seal the hair cuticle-reducing breakage and increasing shine. I use the 3 Minute Miracle almost every time I shower unless I'm in a big rush. I'm not entirely sure if you're supposed to use it every time, but it makes my hair feel SO much better than my other conditioner. So that step has also really, really helped the condition of my hair.

For shampoo, I haven't found a Holy Grail product yet. I try new shampoos all the time. Currently I am finishing up my Herbal Essences moisturizing shampoo for dry hair. It has done a decent job, but I will probably try something different when it runs out because it didn't blow me away. When I'm not using my Aussie conditioner, I have been using this Nexxus conditioner that is supposed to seal up split ends. I randomly got this conditioner as a sample and I loved the smell so much I bought it! Plus it came with a $3 off coupon so that helped push me to buy it...because for a drug store brand its quite pricey! This conditioner is nice, it does make your hair feel pretty silky when you are rinsing it out, but I won't be buying it again- I will probably try something new and hopefully even better! I think another thing that helps the condition of my hair tremendously is very minimal heat use. Mostly due to laziness I only usually blow-dry my hair once a week-ESPECIALLY in the summer. In the winter that number increases to probably 3 or 4 times/week because it's so cold you can't leave the house with wet hair! But the lack of heat use in the summer most definitely benefits my hair. So that is pretty much it for my current hair story. ~I have a neat little trick for reducing flyaways that I am going to show in another post coming soon!~ Do you guys have hair products you can't live without, please do share!!


Have a great night!! xxx

Monday, August 20, 2012

Makeup Forever Aqua Cream: Swatches and Review


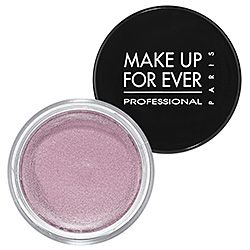
These Aqua Creams have been a staple for me this summer. They are completely waterproof and stay on incredibly well for as long as you need them to. For example, the other day I was wearing one of these and even after working out and literally dripping with sweat (really attractive I know), the eyeshadow was still on! It hadn't even budged, I couldn't believe it! I knew these shadows stayed well but I didn't think anything could survive a workout unscathed. They are very similar to their cheaper counterpart, Maybelline Color Tattoos, except in my opinion Makeup Forever provides more and better color options. There are roughly double the colors in Aqua Creams and in my opinion there are more wearable options. Maybelline Color Tattoos have some amazing colors, but there aren't as many light neutrals like pinks and nudes that are provided by the Aqua Creams. The Makeup Forever shadows have crazy colors, but they also provide incredibly wearable colors that are so easy to just throw on before leaving the house. This product is fantastic for quick, easy morning application. It is basically effortless to apply this cream shadow, and you won't have to worry about it creasing. The Color Tattoos are resistant to creasing as well, but in my opinion the Aqua Creams are even more so. The great thing is you DO NOT need a primer with these shadows. Not needing to apply a primer makes application even quicker and easier. You can use these as a cream base for a powder shadow, or on their own, and they look fabulous either way. They contain mother of pearl pigment that creates a luminous but not overwhelming sheen. These shadows are very easily blended but you need to blend them rather quickly so they don't set. Now for some downsides. The first thing I noticed about these shadows was the packaging. Other cream shadows like the Color Tattoos and MAC paint pots are encased in small glass jars, which make them feel very high quality and luxurious. I was surprised to find out that the Aqua Cream shadows have light plastic packaging. It makes them feel very cheap. This isn't a deal breaker, but it's just a small detail that detracts from the overall rating of the product. On the upside, the plastic packaging makes these shadows lighter and therefore easier to carry around in your makeup bag. Secondly, although the pigmentation and application are really nice, you may need 2-3 coats to achieve a completely flawless and patch free appearance. I have noticed when products are waterproof and stay for a long time, they tend to go on patchy at first, I'm not sure why that is, but it's the case with these Aqua Creams and was also the case with the eyeshadow crayons I reviewed in a previous post. I often will just put one layer on and it looks fine, but if you want a completely opaque application, you make need 2-3 coats. Lastly, but importantly, the price. Frequently when I review higher end products the price has to be listed as a downside. These Aqua Creams are very pricey compared to the Color Tattoos and just in general. They are $23.00 a pop. If you make sure to close the lid tightly, they will last a long time because you use such a small amount each time, but it might not be worth the price for a lot of people.
Overall.... I am a huge fan of the Makeup Forever Aqua Creams. I adore the color range and how well they stay on the lid. If Maybelline offered just as many color options as Makeup Forever, I would most likely just stick with the Color Tattoos because they are so much cheaper and so close in quality to the more expensive Aqua Creams. But the light pastels and wearable options offered by Makeup Forever keep me buying these cream shadows regardless of the price. Hope this review was helpful! Please leave any questions in the comments section and I will be happy to answer them! xx

Left: 16 Pink Beige
     Middle: 1 Silvery Charcoal Shimmer
 Right: 18 Light Lilac

Left: 16
Middle: 18
Right: 1


Sunday, August 19, 2012

OOTW: Dinner in the city

It was such a gorgeous balmy night this past Friday in Boston, the perfect night for a great outing!

Due to bad lighting the top looks peach, it's actually light pink
Top: Forever21
Shorts: Urban Outfitters
Shoes: Steve Madden via Famous Footwear

Brown smokey eye
MAC eyeshadow: Woodwinked all over lid
L'Oreal Infallible eyshadow: Iced Latte on inner corner
Urban Decay eyeshadow: Busted on outer corner and crease
Clinique eyeliner: Intense Midnight on upper and lower lashline
L'Oreal Telescopic Clean Definition mascara: Black


Foundation: Urban Decay Naked in 3.5
Blush: NARS Torrid

Saturday, August 18, 2012

Copycat Makeup

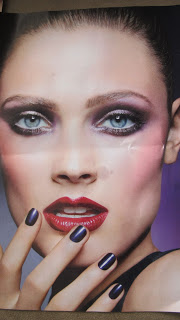
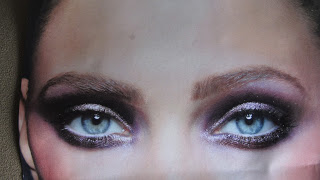
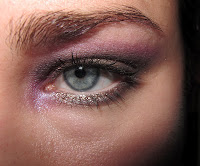
One of my favorite activities is going through magazines and picking out fun/interesting/crazy makeup looks and trying them out! This Estee Lauder makeup advertisement from Elle magazine caught my eye. I loved the drama of the dark purple combined with the gold and I thought it would be a great one to experiment with!

Original

Original
                      
              Original

Recreation


Recreation

Recreation

What do you think?? Have a great night! xx