Friday, March 29, 2013

Contour and Highlight Like Kim Kardashian

Ever since Kim Kardashian posted that picture on Instagram of her contour and highlight routine pre-blending, it seems like this method is being used everywhere! It looks a little crazy, but it's a great technique to brighten up your face in all the right areas so that your cheek bones stand out and your face looks smaller and more angular.

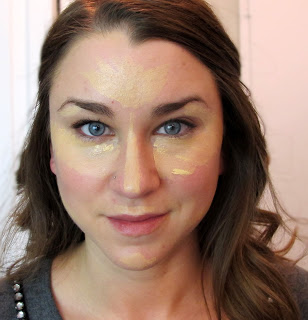
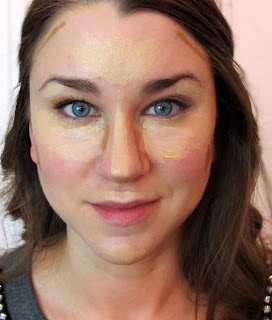
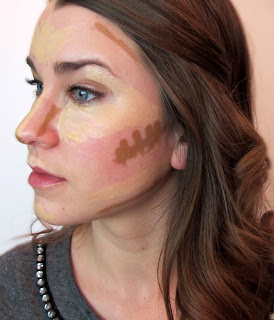
War Paint! This shows where you want to place your highlighter (the white) and where you should place your darker contour color!

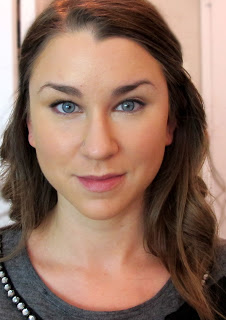
As you can see, this technique makes your face look thinner and helps to define the contours of your face!
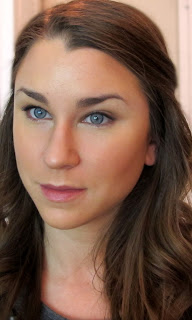
I look very "tan" in the After picture because I used a blending foundation that is a bit too dark for me right now :-)

For this step I used MAC Prep and Prime Highlighter Pen in Light Boost. Place it in all the areas shown in the first picture: Center of the forehead, down the center of the nose, in triangular shapes underneath the eyes, under the brow, along the cupids bow, center of the chin, and above the jaw line

For this step I used Urban Decay 24/7 Concealer Pencil in the darkest color (M16). Place this in all the area shown: temples, underneath the cheek bones, along the sides of the nose, tip of the nose, crease of your eye, and just under the jaw line.

I know, it looks crazy!

After your all painted up, take a damp Beauty Blender sponge and a small amount of foundation. Begin blending and working everything in together, the foundation with the contour and highlight products. Surprisingly, if you use only a small amount of foundation, you don't look too caked up after everything is blended together. And if you use a foundation that matches your skintone (I used one far too dark for me), it will actually look quite natural at the end.

After everything is blended, darken with a powder, mostly under the cheek bones where your natural contour is. My favorite thing to use for contouring is the NYX blush in the color Taupe, it is not too orangey and looks more like a natural shadow than your typical bronzer does. I am looking a bit orangey only because of the color foundation I used :-)

And you're done! 

I love how this method brightens up the face, especially underneath the eyes. Hope you enjoyed! Xoxo

Tuesday, March 26, 2013

Beauty for Vegans + Animal Lovers

Anyone that knows me knows I am a huge animal lover, to the point of annoyance to a lot of people I'm sure. My boyfriend has gotten to the point where he has to pull me along when a cute dog is up ahead on the street so I don't stop to pet it. Kind of like what he does when we pass a Sale sign at Aldo shoes or a Sephora (no joke)! I rant and rave about the evils of wearing fur and endorse just about every animal cause out there from saving the Tigers to ending the senseless slaughter of elephants for their ivory tusks. So, I thought it appropriate to address the issue of the treatment of animals in the world of beauty and cosmetics. I spent a long time researching this issue and came up with a long list of well-known
companies that do not test on animals. There are a myriad of companies that do not test on animals (namely those that have the word "eco" in the title) that are not included in my list because I stuck to only the brands I recognized, I thought it would be more helpful to the mainstream beauty consumer.I was extremely surprised,  happily surprised,  at how many companies are completely against animal testing. I was under the impression that most companies still subscribed to the outdated method. What I figured out was that, while many companies have a strict "no testing policy" other, extremely popular brands, take a more surreptitious approach.

An example of a strict "no testing" policy statement:

From Tarte Cosmetics, a very animal friendly brand with many completely vegan products:
Tarte cosmetics is a cruelty-free cosmetics line. Tarte makeup and skincare is never tested on animals. 

 An example of a sketchy "no testing" policy statement:
From MAC :
The Estée Lauder Companies Inc. is committed to the elimination of animal testing. We are equally committed to consumer health and safety, and bringing to market products that comply with applicable regulations in every country in which our products are sold. We do not conduct animal testing on our products or ingredients, nor ask others to test on our behalf, except when required by law.

MAC is an Estee Lauder company. This sounds all well and good but here is the kicker, "when required by law" refers to products that are sold in China, a country that still legally mandates animal testing on all products sold to the Chinese public. This means that MAC/Estee Lauder products may not be tested on animals here in the United States, but they sell their products to China, who do animal test.

Now on to animal products. This is for vegans who do not wish to use products that come from animals in any capacity. For you guys, here is what to look for:
  • beeswax (often found in lip products)
  • carmine (from cochineal or smashed bugs, usually added to red or pink blush-on or lip products)
  • pearl powder (from clams)
  • allantoin (from the uric acid of cows/mammals, sometimes added to mineral makeup)
  • collagen (either from animals or human placenta)
  • silk powder
  • elastin (usually found in mascaras; derived from cows)
There are many other products derived from animals, specially in skincare, but the ones above are probably the most common you would see in makeup. 

Some big brands that offer vegan options:
-Urban Decay
-Tarte Cosmetics
-Obsessive Compulsive Cosmetics *fully vegan*
-Hourglass cosmetics
-Sparitual nail polish (via Sephora)
-Cover Fx
-Eyeko
-The New Black nailpolish (via Sephora)
-Nude skincare
-Lush cosmetics
-Smashbox cosmetics
-Josie Maran
-NARS
-Zoya
-ELF cosmetics

Keep in mind, most makeup brands offer vegan products just because animal products are not used in some makeup. The ones above are just options, but I encourage you to continue exploring!

A list of well-known brands that do not test on animals: 
-Ahava + vegan
-Anastasia Beverly hills
-Ardell
-Aveda
-Bath and Body works
-Bare Escentuals
-Beauty So Clean
-Boscia
-Carol’s Daughter
-Clinique*
-Cover FX
-Dermalogica
-ELF cosmetics
-eco tools
-First Aid Beauty
-Hourglass
-Jack Black
-Jane Iredale
-Jesses girl
-Liz Earle
-Lush
-MAC + Estee Lauder*
-Makeup Forever*
-NARS
-NYX
-Orly
-Physicians formula
-Prada
-Pur Minerals
-Skyn Iceland
-Smashbox*
-Stila
-terranova
-Too Faced + vegan
-the body shop
-trish mcevoy
-tropez
-urban decay
-wet and wild

My take: I really commend and respect anyone willing to take on the challenge of leading a vegan or vegetarian lifestyle. I, myself, am not vegan so I don't screen my makeup for animal related products. I also, occasionally, will buy MAC products. It may seem hypocritical coming from an animal lover. I try my best to lead my life with animal welfare in mind and donate to and shed light upon causes when I can and MACs decision to endorse animal testing, even if not in the United States is disappointing  However, I am confident that with continued pressure from MAC fans they will eventually, hopefully, commit to a more strict anti-animal testing policy.

Hope this was helpful! Leave any comments or questions below :-)

Sunday, March 24, 2013

Embracing Emerald

Pantone Universe named Emerald color of the year! I love this choice, Emerald is a beautiful color than can be sported in so many different ways. I thought I would show you guys some options!

Products Used:
Revlon Colorstay foundation, Maybelline dream lumi touch concealer, Maybelline color tattoo in Barely Beige, Jessie's Girl eye glitter, MAC eyeliner pencil in Minted, Urban Decay Vice palette color Unhinged,  L'Oreal Telescopic shocking extensions mascara, Revlon lip butter in Creamsicle, NARS lip gloss in Turkish Delight

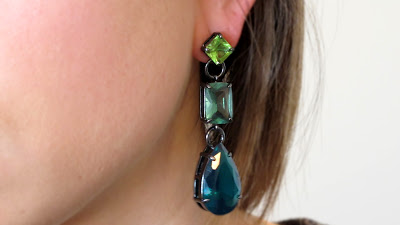
Earrings from JewelMint

Ring from Joveda

Nail polish from the Birchbox shop

Long blouse from Express


Have a great Sunday!
XOXO

Saturday, March 23, 2013

The best powder-ever!-

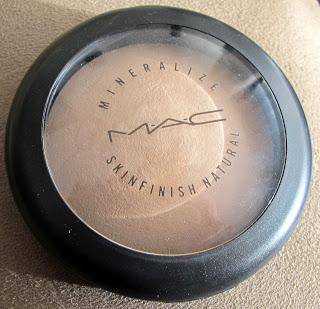
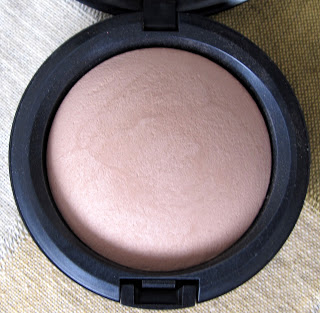
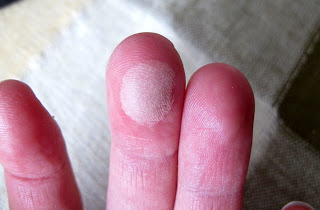
Face powders are one of those products that I think people tend to be a little cautious of because they think powder will make their face look cakey, which we all know is NOT cute. I happen to really love powder because it not only sets your makeup and makes it last longer, but it also creates a more airbrushed and perfected look and really helps control oil throughout the day. You can go for a translucent powder or a powder that adds some additional coverage. I have been happy with my Revlon and Maybelline face powders, and I also picked up a Benefit one which is nice as well, but NOTHING has compared to MAC's Mineralize Skinfinish  Natural. I had heard sooo much about this product, but never tried it because I was satisfied with the powders I had. I also thought it may be too shimmery for my taste. I am not really sure what prompted me to purchase it, but I am so happy I did. This powder is wonderful because, somehow, it does not look like you're wearing powder after you apply. It clings to little hairs on your face so much less than other powders I've used and it creates the most natural, yet glowing and perfected finish. It seems to fill in all the little places your foundation has missed without looking cakey. This also helps to keep your makeup in place throughout the day. If you don't already have this powder, and are up for trying something new, I would absolutely recommend giving this a try. You can also give it a go at a MAC station. Have a makeup artist put it on you and see the results for yourself! If you get the skinfinish "natural" it won't be overly shimmery and adds just enough to bring light to the face without making you look like a walking disco ball! The one downfall I have noticed is that if you put it underneath your eyes to set your concealer it settles into fine lines just a bit. Hope this was helpful, whats your favorite powder?!


Tuesday, March 19, 2013

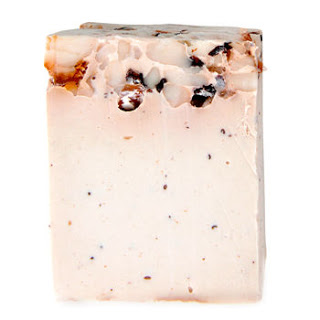
Lush Soap Review

After my initial experience with Lush soap, I knew there would be more in my future. What I didn't expect was how much my boyfriend (the, just grab me the cheapest soap on the shelf, guy) loved them! He was actually the one to suggest that we go back and pick up some different soaps to try. We decided to get the original soap I got again, and then try 3 different ones. I thought I would rank the 4 soaps from my favorite to least favorite and tell you guys a little bit about each one!

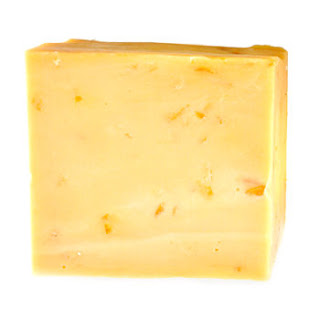
1. Sultana of Soap
This was the original soap that we got and after trying a few more it is still my favorite. The smell is just intoxicating and literally sticks with you all day long. It moisturizes and lightly exfoliates the skin and really makes your shower experience fell like a spa day! This is probably the nicest soap I have ever used, I high;y recommend it!
2. Sexy Peel
I was so happy with this soap the first time I used it. The smell is very strong orange-citrus but it has a zestiness and a sweetness that does not make it overpowering. Besides the amazing smell, this soap is phenomenal for exfoliated. The little pieces of peel feel so nice on the skin and really scrub for a super clean feeling.
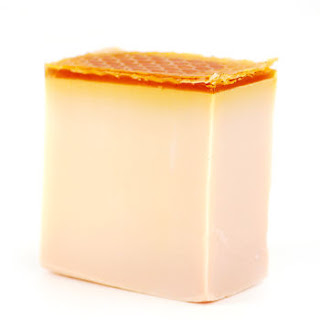
3. Honey I Washed the Kids
I had really high hopes for this soap because it contains caramel and the top is pure honeycomb. The sales associate said it would be nice and moisturizing and it also smelled great. This soap is nice, but the smell isn't as strong as the others. Also, the honeycomb takes a long time to soften up, so the rest of the soap gets used up much quicker and you are left with just the honeycomb, which is kind of difficult to wash with. However, this soap did provide some great moisture to the skin.
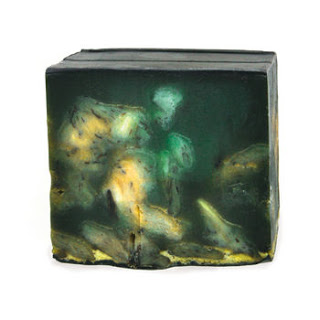
4. Demon in the Dark
This soap was very highly recommended by the sales associate, but this was my least favorite out of all the soaps. We were told that this soap would provide a tingly feeling, but I didn't get that when I used it. Also, the smell isn't really my cup of tea, but I could definitely see a guy liking it because it has the most masculine smell out of the four. I didn't really get the moisturizing or the exfoliating effects from this soap like I did from the others. The positive was that this soap lasted the longest out of all of them. 

Overall, I highly recommend checking out this store and trying out some of their products. I am most definitely a convert and I look forward to trying out their hair products and possibly some different soaps, lotions ect. 

Hope this was helpful! Have you tried Lush soaps?

Monday, March 18, 2013

Some quick makeup questions answered

My sister had some questions about my recent makeup post so I figured some other people might have the same questions!


1. Explain face highlighting, do you need to blend it?
   
        For highlighting the face (tops of cheek bones ect.) I will use a powder or a cream based highlighter. If it is a powder highlighter, you can use a brush to sweep it over parts of your face that you want to attract light to, you shouldn't really need to blend beyond that. If it's a cream, just blend it in with your finger until you can't see any "edges."

2. Why did you use two different concealers, which one do you use first?
 
       Lately I have been liking using a concealer for hiding blemishes and a concealer for highlighting dark areas. In my most recent makeup post, I used the Covergirl and Olay concealer all over the under-eye area to cover up darkness. I think used the Maybelline concealer to highlight just wear the circles are darkest. So I used the Olay concealer first and then the Maybelline on top.

3. What prompted you to buy gold eyeliner?
   
      A lot of time I find myself seeking out and buying certain products for a specific makeup look that I have in mind. Sometimes these products get used once and then go to the back of the drawer until I re-discover them. I am pretty sure the Stila gold liner I used in the Spring makeup was sold on Hautelook and I just thought it was a good deal...I can't remember exactly but I'm sure I had reasoning at the time ;-).

4. How did you know the blush would work on you before you bought, same with lipstick?
 
     A lot of trial and error. I have bought certain colored blushes in the past and realized I didn't like how they look on me as much as others. Typically, I think pinks look better on me than corals, and I figured that out just by trying both. Same goes with lipstick, I have figured out pink lipsticks with blue undertones don't look very good on me, you will begin to see the different undertones in lipstick after a while. Before you can tell with the naked eye, you can usually find out online. Other than that it is still trial and error for me. There are a lot of things I buy that I don't love on me, sometimes I keep them sometimes I return them. It's really hard because, especially in the drug store, you don't really know how something will look on you until you get it home and also see it in natural light. Just remember to keep your receipts so you can return colors that you don't love, then it can be guilt free trial and error because you aren't just hoarding all the makeup rejects.

5. Did you use the blue eyeshadow on the inner eye or something else? (Reference the Spring makeup)
 
     I used MAC Nylon for the inner eye and a different blue shade for the lid, I made it more specific in the actual post :-). Check out my post for MAC Nylon here!


Hope this helped! I LOVE getting these types of questions, they actually make my day! Sometimes friends will text me with beauty related questions and I just love it, keep them coming!! Xoxo
Bright makeup for Spring!

This has to be one of my favorite makeup looks that has been featured on my blog to date! I love the bright and glowyness of this makeup and I think it is the perfect pick-me-up while we are waiting for the nicer weather to set in! It is also super easy and a look anyone can achieve, if they are willing to be a little bit bold :-)!


Step 1: Apply foundation and concealer.
Choose a foundation that will give your skin a healthy, smooth finish
and a concealer that will brighten your eye area!

Step 2: Apply a light, shimmery blue eyeshadow all over the lid.

Step 3: Use a bright eyeshadow (I used MAC Nylon) to highlight the tear 
duct area and underneath the eyebrow. 

Step 4: Use a gold eye pencil to line your water-line and
smudge along your lower lash-line.

Step 5: The fun part! Apply a gold liquid liner all along your lower
lash-line over the gold eyeliner. I know NYX makes great ones, this one
is from Urban Decay and I love it!

Step 6: Apply several coats of a lengthening mascara to the 
upper lashes. I chose to leave my bottom lashes bare.

Step 7: Apply a bright pink blush and lots of highlighter to the
tops of the cheek bones, cupids bow, center of the nose and center
of the forehead for ultimate glow-age.
I am well aware I'm "pouting" in this picture but it was the best one
that showed off the blush, ha!

Step 8: Apply a bright purple-pink lipstick!

You're done! A bright, sparkly look for the spring and summer!


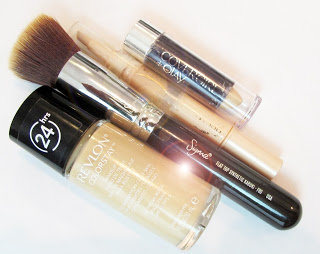
What I Used
Revlon Colorstay foundation (I forgot how much I love this foundation
but the color is too dark for me right now, in some lights it looks orange :-( )
Sigma F80 Kabuki Brush
Maybelline Dream Lumi Touch Concealer in Radiant
Covergirl and Olay Concealer

I started with a base over my whole eyelid using MAC paint pot
in Painterly
For the light blue color I used the 2nd to lightest color in the palette:
Maybelline Eye Studio in Olive Martini and applied it with a 
Real Techniques Shader brush
For the gold eyeliner I used Stila eyeliner in Koi
The sparkly gold liquid liner is Urban Decay's Naked Cowboy
Finally, for Macara I used Illegal Length by Maybelline

For blush I used Maybelline's Dream Bouncy blush in Fresh Pink
and a Real Techniques Pointed Foundation Brush
For the highlighter I used MAC's Mineralize Skinfinish

For the lips I used this Maybelline The Vivids color in Hot Plum, I am
obsessed with this whole collection and especially this color!!

Hope you enjoyed and have a great week XOXO

Saturday, March 16, 2013

Shopaholic Tag

1. Would you consider yourself a shopaholic?
Could probably be clinically diagnosed. In other words, YES! I am a shopaholic!


2. How would you classify your style?
There's honestly not one type of style I gravitate towards, I like all different kinds of things. But generally, I go for classy, comfortable, trendy with some edginess thrown in there. 

3. What store can you not leave without buying at least one thing?

Well, Sephora, no question. Also probably Forever 21 and weirdly, CVS! It is so hard for me to leave the drug store without picking up something from the makeup section!

4. Where do you find the best deals?

Loft and Express have fantastic deals. Almost every other day I see 50% of sales, 40% of sales, its like they give stuff away!

5. What designer are you willing to splurge for?


Probably J Brand Jeans. I am definitely willing to splurge for some amazing jeans because generally I find jeans pretty uncomfortable, so when I put on my first pair of "high end" jeans I knew I couldn't go back. There's no squeeze around your waste, they don't loosen up and loose their shape, and they are just so comfortable!


7. What is your guilty pleasure? (Not including makeup)

Definitely, without a doubt, watches. Watches are expensive, so it is for sure a guilty pleasure when I get a new watch, but I think they are the best accessory. 

8. What is one staple clothing piece you cannot live without?

I have to say my J Brand jeans (I only have one pair and then I have a pair of velour black pants from there). I could not live without those jeans, they are pretty much the only ones I wear ha! 

9. What is a trend you hope never goes out of style?

I hope over-sized bags, jewelry and sunglasses and gold accessories never go out of style, also bows!

10. What trend did you love that passed way to quickly?

Hmmm, this is a tough one. I can think of lots of trends that I am VERY happy are over (i.e., platform shoes from the 90's, crimped hair, everything from the 70's and 80s)...but as for trends that should come back? Oversized floppy hats are kind of great, and I love 60's hair and makeup!

11. Who is your fashion icon?
I honestly don't really have a fashion "icon", but I love the style of some of the younger celebs like Blake Lively, Rachel Bilson, Lady Gaga...just kidding! haha


What are your answers?! XOxo

Wednesday, March 13, 2013

The best browbone/inner eye highlight

MAC's eyeshadow in Nylon must be one of their best sellers because it is the perfect shade for highlighting your tear duct area and underneath your eyebrow. It adds just the right amount of shimmer without being too over the top. It is a frost, so it has fine, but strong shimmer that gives a very shiny effect almost metallic effect. I typically don't go for frost eyeshadows but I have seen Nylon used and I always love the way it looks for bringing just the right amount of light to the eye area. Nylon also has a gold, yellowy tone to it which makes the highlight warm, instead of harsh and trashy looking. A small amount of of this in the tear duct, under the brow and even a little bit just in the center of the lid can make you look more awake and glowy. I am a huge fan of this technique because I really feel like it makes me look less tired, which I need desperately because I am always looking drained these days! Any little thing I can do to look less exhausted is high on my list! I chose to pick up Nylon because I feel like I don't have one eyeshadow that I go to consistently for highlighting, and I wanted one that I can just use without thinking. This should work wonderfully on any skin tone and is a great basic to have in your collection. Do you have any go-to highlighter eyeshadows?? Hope this was helpful and have a great night! xx


Sunday, March 10, 2013

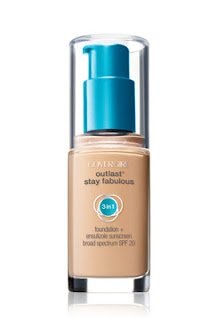
NEW! Covergirl 3 in 1 foundation review

This has to be one of the best drugstore products I have picked up recently. It seems like the drugstore has seriously stepped it up in the past year or so and has been displaying some really great products. Items like the Maybelline Color Tattoos and the Revlon Lip Butters have blown up to the point where several weeks after their initial release they were sold out everywhere! This increase in drugstore makeup quality and efficacy has really increased my confidence in what I buy there. It has almost become a mission/obsession of mine to find the best products the drugstore has to offer; a mission that has had both hits and misses. Well, I can gladly say that the Covergirl 3 in 1 foundation is a definite HIT! There wasn't really a particular reason I grabbed this one off the shelf other than the fact that it boasted to act like a primer, concealer and foundation all in one. That seemed like an interesting claim to me, so I gave it a go.

Formula:
The formula of this product feels fairly similar to most other foundations out there. It isn't super thick, it is more on the runny side but not in a bad way because that helps it to go on light and smooth. There is no added scent, it just smells like foundation to me ha! I can't really explain the scent, but it definitely isn't a smell that should bother anyone.

Coverage:
The coverage is one of the high points of this foundation. I think it does an excellent job of covering redness and blemishes without a ton of product. It doesn't leave your face looking cakey, but actually looks rather natural after application even though the coverage is medium to full. It dries to a satin finish, but isn't drying on the skin like a lot of matte foundations area.

Color Selection:
The color selection is pretty great for this foundation. There are a whopping 14 color choices that seem to address not only skin color but undertones (pink or yellow) as well. If you are someone that has a difficult time finding the right shade for your skin, I would definitely check out this foundation. I would recommend going to the Covergirl website and surveying the options before making a trip to the store. That way you'll have something in mind that you think will match you and you won't be stuck staring at the options for hours!

Lasting Power:
This is always a tricky one to report on for me because at the end of an 8 hour day it is rare that any foundation looks as good as it did when I first put it on. From what I can tell, the lasting power of this foundation is pretty similar to most others I've tried, nothing life-changing but definitely comparable to high-end and other drugstore foundations.

Hope this was helpful! You can check out this foundation in action in my most recent Get Ready With Me vid! Let me know if there is any additional information about this foundation that would be helpful, I'd be happy to answer any questions!! XOXO

Friday, March 8, 2013

Get Ready With Me: Work/Everyday

These videos have been everywhere on Youtube lately and I find them so fun to watch! I have been wanting to do a video like this for a while but just haven't had a good time to do it. This is how I get ready for work pretty much on a daily basis. The outfit is more on the casual side! Enjoy!! XOXO


Thursday, March 7, 2013

March Birchbox

Here are the contents of my March Birchbox, I felt like it was a pretty good one!

Serge Normant: Meta Revive Dry Shampoo
"This A-list stylist created this volume-boosting mist to give second-day locks
a lift. Bonus: The subtle fragrance leaves hair sweetly scented.
Full size $25
Defintely excited to try this! I currently use the Tresemme Fresh Start
dry shampoo to amp up second day hair so I can't wait to see how this one
compares. I will report back once I've tried it!

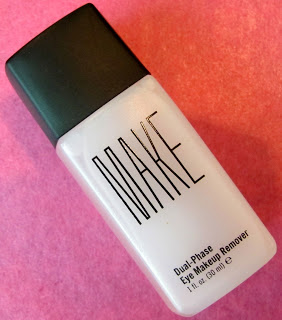
Make: Dual-Phase Eye makeup Remover
"Opposites attract in this gentle-but seriously effective-remover. 
Shake to combine the layers of oil, chamomile, and cucumber infused H20, then apply 
with a cotton ball. 
Full size $18
$18 is pricey for a makeup remover so I am interested to try this to see how it
compares to the drug store brands. Makeup remover can be really irritating
so I am hoping this one is more gentle. I have also heard oil is great for breaking
down stubborn makeup without a ton of rubbing!

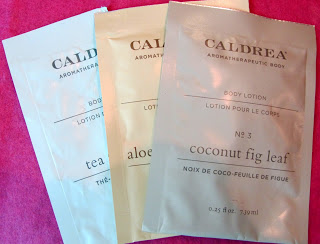
Caldrea: Body Lotion
"We adore these elegant body lotions, which come in three ethereal scents:
Tea Olive Lime, Aloe Water Apricot, and Coconut Fig.
Full size $22
I actually tried the Tea Olive Lime one and I loved it. The smell was amazing
and so fragrant it filled up the entire bathroom with the scent. I could also smell
it on my skin for several hours after applying. The consistency was really nice too,
not super thick, but very moisturizing. It felt quite luxurious. I feel like I am happy and
content with my drug store brands until I get samples of this high end stuff and I realize
what I'm missing!

Madewell for Birchbox: Emery Board
"We teamed up with Madewell to create this adorable mani savoir,
patterned after a print from their new spring collection.
Full size $5
I think this is super adorable! 

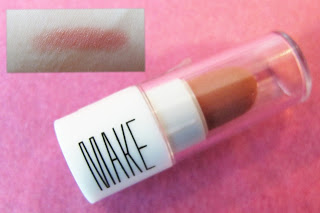
Make: Lipstick 
"We were smitten with this new brand's lovely pigments even before
we found out that one-third of all sales are donated to charity. We'll take one in
every shade."
Full size $18
There is a separate card that says a little bit more about this lipstick:
Creamy, matte and lustrous finishes, in gorgeous, hydrating shades.
I swatched this on my arm and I can confirm it's very smooth and feels
like it would be hydrating, which is great for a matte lipstick. I like the color a lot too,
it seems like a nice neutral. It probably isn't a super long-wearing lipstick, but I am
excited to try it out!


What did you get in your Birchbox this month?

Tuesday, March 5, 2013

Maybelline The Vivids Lipstick Review

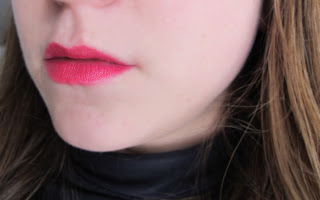
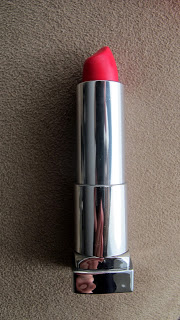
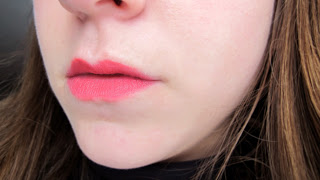
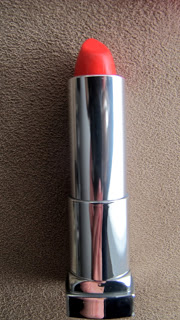
A newer release from Maybelline, these Vivid lipsticks are different than anything I have seen recently in the drug store. The website describes them as having brighter color payoff because of "exclusively vivid pigments." They also contain honey nectar for added moisture. I was actually in target looking for a lipstick for Valentine's day makeup, and I spotted this display. I had seen it before and passed it by many times because it just didn't interest me all that much. However, upon a closer look I was drawn to the Wild Rose color so I decided to give it a go. I was SO happy with this color when I got it home. The last lipstick color I liked this much was my dark plum colored lipstick from Mac that I wore a bunch during fall and the beginning of winter. The Wild Rose color is a bright, yet saturated pink that is eye-catching but surprisingly wearable. I wore it out as soon as I had the chance and I did not feel overly conspicuous or self-conscious. I do recommend a slightly more down-played eye just to avoid the hooker look, unless that's what your going for of course ;-). I would describe the formula of this lipstick to be fairly typical, nothing extremely good or bad. It is quite moisturizing, but it doesn't dry to an ultra glossy or shiny finish. It doesn't dry to a matte finish either, it's kind of in between. I like it because it doesn't cling to dry patches like some of the matte lipsticks do, but it doesn't have that tacky frosty finish either. Because I liked the first color I chose so much, I grabbed another one next time I was at the store. This seems to be my habit. Instead of just enjoying the one product and color for what it is, I want to try and replicate that satisfaction again and again! Normally, as was the case this time, it didn't exactly pan out. The second color I got is called Shocking Coral. This color turned out to be more red than I would like. Actually, the entire Vivids collection seems to be a bit dominated by reds and oranges, and doesn't really have many pinks. I think this is surprising because a bright pink would probably be a quick sell. I probably won't get nearly as much use out of the Coral color as I will the original Rose color, but I am willing to give it a shot. Overall, if you are into a bold lip right now or are looking for a fun new color for Spring, I would definitely give this collection a go. Remember, save your receipt and you can return it if you don't like it! Almost all drug stores abide by that policy now and it has really saved me from accumulating makeup I won't use. Or, let me re-phrase, accumulate MORE makeup I don't use. ha ha ;-). Hope you enjoyed this post! Have you guys purchased anything from The Vivids?

Wild Rose

Wild Rose

Shocking Coral
This color looks much darker in person! It like glowed in this picture,
maybe it was the lighting but it isn't nearly this bright in my opinion.

Shocking Color

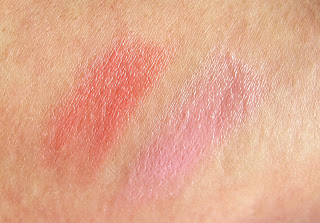
Swatches
Wild Rose on top, Shocking Coral below
Another note, Shocking Coral looks more pink in person, and less orange as this picture shows.
I find lipsticks difficult to photograph sometimes. Certain colors just don't come out right.
If anyone has any tips on how to get more accurate color in photos let me know!