Tuesday, July 31, 2012

How I used my brushes: Face

For my EYE brush descriptions click here!


Starting on the left:
1. RT (Real Techniques) Kabuki brush: This brush is great for buffing on bronzer or blush. It is short so you have a lot of control and the buffing motion creates a very natural look. This brush also splits down the middle so it becomes a horizontally flat brush. When it is in it's flat form it is great for contouring underneath your cheek bones!
2. RT Stippling brush: I typically use this brush with foundation. By using a stippling motion and a circular buffing motion you can achieve a flawless look. The stippling motion (quick tapping) gets the foundation into the pours and results in an airbrushed effect. This brush is also great for cream products such as cream blush, cream bronzer, or cream highlighter.
3. Sephora double ended powder brush: This is another brush I use a lot. The end is stiff and compact so I really like using it to apply mattifying pressed powder. By pressing the powder into the skin instead of sweeping it across, it looks a little more natural and doesn't disturb the makeup you already have on. I don't use the other end of the brush often, but when I do I typically use it for blush application.
4. RT Contour brush: This brush is the perfect size and shape for creating contour on your face. You can work bronzer into the hollows of your cheek for a chiseled effect and highlighter on the tops of your cheekbones with the same brush to highlight the high points of your face. This brush is extremely soft and I use it all the time, especially for highlighter!
5. RT Setting brush: I use this brush every single morning! I use it to apply my Bobbi Brown setting powder over my under eye concealer to keep it in place all day. The thin shape allows you to get right up under the lash line and is much less cumbersome than using a larger powder brush. This brush is also incredibly soft, so it is very gentle on the delicate under eye region.
6. Sephora Foundation brush: This is your standard, traditional foundation brush. Strangely enough, this is my least favorite brush to apply foundation with. You can get a lot of coverage using this brush because it smooths and spreads out the foundation v. buffing it into the skin. I find that, although it creates nice coverage, it can make your foundation look a little streaky and less natural. Some people are huge fans of this type of brush and it definitely works better with some foundation than others but is not the brush I typically reach for.
7. Essence of Beauty blush brush: This brush is from the drug store but I use it all the time to apply powder blush. It is the perfect size and has a slightly flattened shape, so it is excellent for sweeping color on the apples of your cheeks and up towards your hairline. It isn't as soft as my other brushes, but it has never shed and has held up really well!
8. RT Blush brush: Although this is called a blush brush, I haven't used it yet for that purpose. This brush is large and so incredibly soft that I love using it to dust on loose powder. Loose powder is great for setting your foundation and blush and keeping oil production down throughout the day. I would use this brush for just about anything though because it is so luxurious feeling!
9. RT Expert Face brush: This is my all-time favorite foundation brush! The brush is very compact so you can really buff the foundation into the skin and get a very natural look. It is on the smaller side, so you have a lot of control and precision. Like all the RT brushes, this one is also very soft and gentle on the skin.

I hope this was helpful! Do you guys have a favorite brush that you absolutely can't live without?? Xx

Monday, July 30, 2012

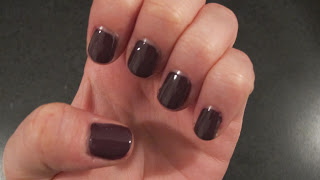
NOTD: Mint magic!

This is from the new Maybelline Color Show nail polish line, the color is Green With Envy. The formula of this nail polish is really nice and goes on smoothly without clumping or stickiness. My polish started to chip after about 2 days, which is not ideal, but that seems to happen to me with most nail polishes even with a top coat! This also the perfect shade of Mint, the color of the summer!


Sunday, July 29, 2012

AveeNO! My problem with Aveeno Positively Radiant Moisturizer

I saw a commercial for the Aveeno Active Naturals Positively Radiant facial moisturizer and I thought it was a great concept. The moisturizer claims to give you more radiant looking skin by brightening your complexion and evening out skin tone and texture. It also has SPF 30 which is great for summer and is Hypoallergenic and Noncomedogenic (won't clog pores). It is oil-free and all natural, all in all it seems like the perfect daily moisturizer. I had high hopes for this product because I love my Aveeno exfoliating body scrub and I love the idea of more radiant skin (who wouldn't right?) This moisturizer was also almost $20.00!!! which is very expensive for a drug store moisturizer...this made me think that it must be high quality. I have had basically the same facial skin care routine since 7th grade. The reason for that is I have very sensitive skin and tend to have bad reactions when I switch things up. I thought that the Aveeno would be fine because it is all natural and hypoallergenic. Unfortunately, I was wrong and this morning, after just about 3 days of using this moisturizer in the morning and at night, I discovered a hive-like reaction on my cheek. The area does not itch or hurt, but its certainly not attractive. It consists mainly of redness and raised areas. This is not a huge shock to me because i do know my skin is sensitive, but it was still a bummer. Not only was this product expensive, but I was really excited about what it claimed to do. FORTUNATELY, I was able to return this product to CVS because I had saved my receipt. ALWAYS save your drug store receipts guys because these days you can return almost anything...and it is so worth it to get your money back for products you won't use. This product, of course, may work perfectly well for other people, but I wanted to share my experience so people with sensitive skin, like myself, will know to be a bit cautious with it. Have you guys had similar experiences with products?


Saturday, July 28, 2012

OOTD: Date Night

This is what I wore out to dinner last night in Boston. We went to a great place on Newbury st. that is more on the casual side and sat outside on the patio. It was a beautiful night and we enjoyed dinner and drinks while people watching!

Deep Coral pants: Ideeli
Striped top: Express
Black Cami: Urban Outfitters

Shoes: LeSportSac purchased at DSW

Floral Crossbody Bag: Liz Claiborne purchased at TJ Maxx
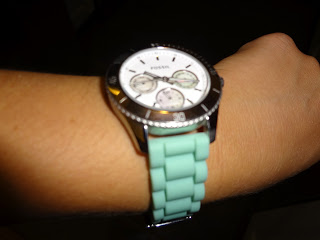
Fossil watch with a band that can be changed.
The band is usually white silicone but I purchased a mint silicone band for the summer!

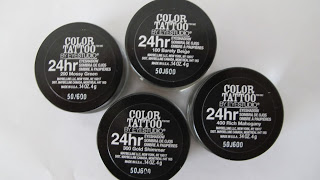
Makeup: Bronze eyes using Maybelline Color Tattoo in Bad To The Bronze and  Urban Decay Bootycall +Maybelline Define-a-line stick eyeliner in Brownish Black
Mascara: L'oreal Voluminous Million Lashes in Black
Pink Lips: Revlon Just Bitten Kissable Lip Stain & Balm in Honey
Blush: Maybelline Bouncy Blush in Fresh Pink
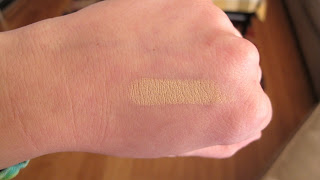
Foundation: Maybelline Super Stay 24 hr in Nude


Friday, July 27, 2012

How I use my makeup brushes: EYES

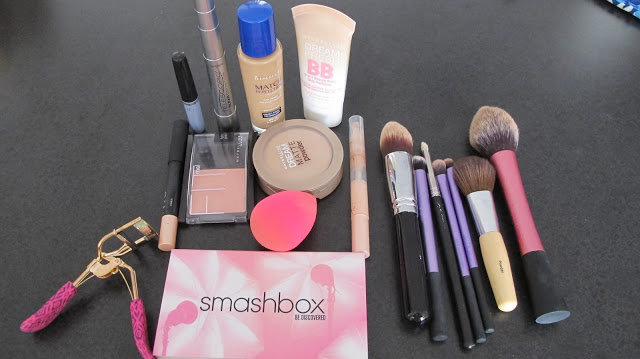
There are sooo many makeup brushes out there it can be so confusing to figure out which ones to buy and what they are used for! In the past I didn't really buy a lot of makeup brushes because I didn't think I needed them to apply my makeup. However, the more I learn about how to apply makeup, the more I realize how critical brushes are to create the look you want. Brushes can also make doing your makeup so much more enjoyable because you are able to be more precise and get better color payoff than when your using your fingers. The great thing is you don't have to spend a ton of money to get fabulous, high quality brushes. Brands like Real Techniques by Samantha Chapman and Sigma Beauty sell soft, luxurious feeling brushes for extremely reasonable prices. I wanted to do a post highlighting some ways to use my favorite brushes. Hope this helps!
*brush holder came with my Real Techniques (RT) brushes

Starting from the left:
1. RT lash and brow groomer: I use this tool to brush through my eyebrows before setting them with a brow gel. This helps to get all your hairs going to the same way and makes them appear more uniform. I use the opposite side of this tool to comb through my lashes if my mascara is making them clumpy. Combing through your lashes will reduce the "spider lash" effect and make them look more natural.
2. Sephora concealer brush: I use this little brush to apply my Bobbi Brown corrector and creamy concealer. It helps you apply a lot of product to the area and allows you to get right up close to the lower lash line for maximum coverage.
3. MAC 217: Just about every makeup artist probably has at least a few of these in their kit. This brush is spectacular for applying a soft defining color to the crease. Just put a light amount of a matte color on the brush and use a windshield wiper motion through the socket line, you'll be amazed at what it can do for your eye! This brush is also great for blending out harsh edges for a softer effect.
4. RT deluxe crease brush: This is my favorite brush to use for blending. It is a bit stiffer and more compact than the MAC 217 so you can quickly and effectively blend out edges. This brush is also great for blending out your under-eye concealer. You can also use this brush for applying a crease color. 
5. RT shading brush: This brush is amazing for packing on eyeshadow for intense color. It is short and dense and picks up a lot of product so you get the color payoff you want without having to apply multiple coats. I also love using this brush for cream eyeshadow. 
6. RT fine liner brush: This is the brush you need if you want to apply gel eyeliner. It allows you to create a precise line with a lot of control and accuracy. 
7. RT base shadow brush: I use this brush to apply a wash of color to the lid. It doesn't pick up as much product as the shading brush and it is more loose and fluffy, so it works great for creating a subtle base color.
8. MAC 219: This brush is a must when you want to be a bit more precise with your eyeshadow. I use this brush to apply eyeshadow to the upper and lower lashline and also to form the outer corner area when I am doing a smokey eye. It gives you a lot of control and it is really a must for me.
9. Ecotools angled eyeliner brush: This brush is the best tool you can use when you want to get the effect of eyeliner with a powder eyeshadow. The angle on the brush makes it very precise so you can trace color along the upper lash line and flick it out at the end if desired. It defines the eye and creates a softer look than if you were to use a liquid, gel or stick eyeliner. A lot of people also use a brush like this to fill in their eyebrows. 

OK! That was longer than I expected so I am going to do my face brushes in another post. I really hope this was helpful for you guys! Have a fantastic day!xx

Thursday, July 26, 2012

Quick Post: Colored Macara

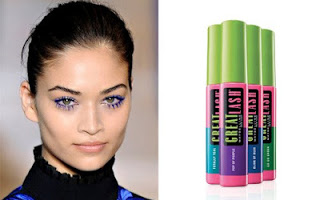
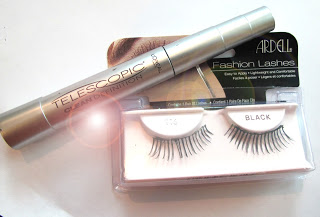
Colored mascara seems to be having a moment this summer. Respected brands have been promoting this new trend and models have been sporting it on the runway! I also recently saw Maybelline advertising their famous Great Lash mascara in colored options. I think this idea could be really fun and there's no harm in changing up your basic black mascara once and a while. I feel like anything goes in the summer! I could see blue mascara looking gorgeous on brown eyes. What do you guys think of this trend, would you wear it?! I will update if I decide to try it out myself! Enjoy your night!xx

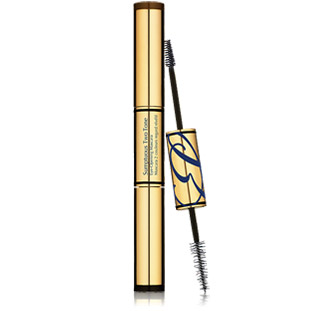
-The picture below is of the new Estee Lauder Sumptuous Two-Toned eye opening mascara. Color options are black and plum, black and rich blue, and black and brown. 


Wednesday, July 25, 2012

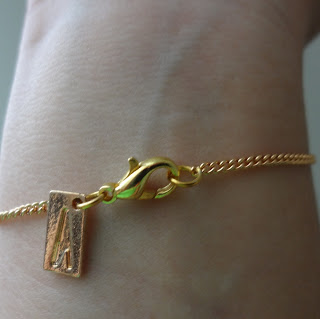
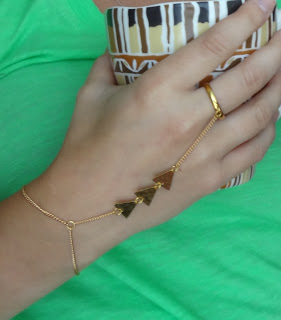
Item Spotlight: Regal Rose Geometric Hand Harness!!

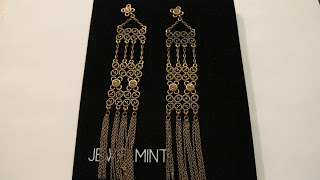
I have recently discovered Regal Rose through a Youtuber I watch and I am so glad I did! Their pieces are edgy and rocker-chic while still being so wearable. I absolutely love the balance they maintain between punk rock/goth and trendy. I like to be adventurous with my jewelry when I can so I am definitely drawn to their unique and eclectic style. Prior to discovering Regal Rose I had been keeping my eye out for a killer "hand harness." I just really love how elegant they look on the hand and how they can totally jazz up your jewelry box. Regal Rose has some lovely hand harnesses, but I settled on a gold one with a very fine, delicate chain and hammered triangles through the center. Gold is something I have never been interested in in the past...but lately I cannot get enough. Although it looks very high end, Regal Rose's jewelry is surprisingly affordable. The brand is based in the UK so the prices are in pounds, but the site automatically converts your payment. I purchased my piece for a little less than $20.00. Despite the reasonable price, the harness feels much more expensive and I am extremely satisfied with the quality. If you are interested in inexpensive, high quality, edgy, gorgeous jewelry, you should definitely check out Regal Rose! This will certainly not be my last purchase from them and I am already eyeing some other items on the website. Enjoy the pictures and feedback is always soooo appreciated!!
*I am in no way affiliated with this company


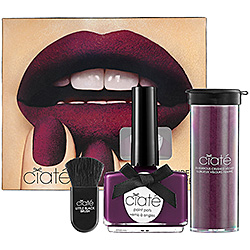
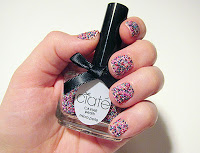
Quick Post: Velvet Nail Trend?

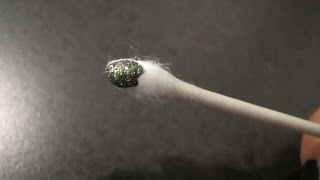
The latest and greatest from Ciate (same company that popularized the Caviar manicure) appears to be the "Velvet Manicure." Apparently the velvet appearance comes from a finely crushed powder that you apply to your nails. Well, it is definitely different and innovative! I applaud any company pushing the envelope and thinking outside the box. Would you guys try this??!


Tuesday, July 24, 2012

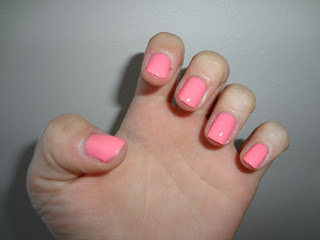
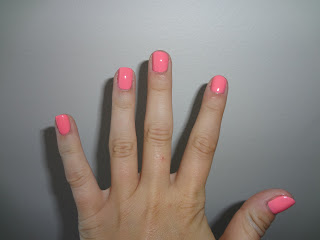
NOTD: Perfect Pink

I haven't gotten a manicure in so long I thought I might as well treat myself! I absolutely love the way freshly manicured nails look. I don't get manicures often because I can paint my nails pretty well myself so it's hard to justify spending money to get them done. However, getting your cuticles perfectly trimmed and your nails perfectly polished is so nice once and a while. What girl doesn't like getting pampered :-). I don't feel like my manicured polish really lasts any longer than when I do it myself, but it is important for me to get my cuticles done every so often to keep them in check. I am so in love with this pink from Essie, it literally is the perfect pink! I am so annoyed because I can't remember what it is called but I'm almost positive it's Knockout Pout. I am going to try and find it at CVS because I really want to own this polish!


Monday, July 23, 2012

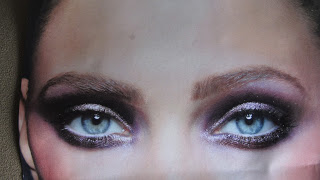
Rose Gold eyemakeup that stays put for summer

Rose Gold has been on the top of everyone's "most wanted" list for quite some time now. Whether it's our jewelry, our watches, or our nail color, it seems like we just can't get enough of the rose-toned amazingness! Since we are embracing all things Rose Gold, why not try it with our makeup? To start with, I applied the Laura Mercier Metallic Creme Eye Colour in Rose Gold all over the lid, up into the crease and on the lower lash line. I then took my trusty L'Oreal Infallible Eyeshadow in Iced Latte and concentrated it on the inner half of the eyelid and in the tear duct region. Then, apply mascara and you're done! This look is incredibly quick, easy and perfect for summer because it has staying power. The L'Oreal eyeshadow claims that it lasts for 24 hours, and in my experience, it is one of the longest lashing eyeshadows I have tried. The Laura Mercier eye cream colour is waterproof and therefore will be resistant to sweat and summer humidity. Pair this with a waterproof mascara and your makeup should be budge-proof for an entire day! Enjoy you're Monday :-)


Sunday, July 22, 2012

NOTD: Blue Metallic

This is the most gorgeous nail color! It is from Essie's new Mirror Metallics line and it did not disappoint. It is literally like applying liquid metal and is very shiny and eye-catching. It goes on smoothly and looks opaque even after one coat. This color is called Blue Rhapsody.


Saturday, July 21, 2012

OOTD: Date Night

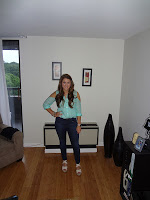
I LOVE this bright mint top from Forever21 with the "cold shoulder" detail. This shirt is a thin, linen-type texture that is very sheer with no stretch. The sleeves go down to the wrist but I thought it looked better on me when they were rolled up. I had to wear a cami underneath which was kind of annoying since I was tucking it in, but at around $20.00 this shirt was a great find and I will definitely be getting a ton of use out of it! This top can be worn to any occasion, but I decided to wear it out for a friday night dinner. Hope you guys are having a great weekend and enjoying the beautiful weather!
     

Top: Forever21

Wedges: Old Navy
 
  Jeans: J Brand


Watch: Urban Outfitters

Beaded bracelets: Aldo Shoes


Thursday, July 19, 2012

Trend: Gilded Eyeliner


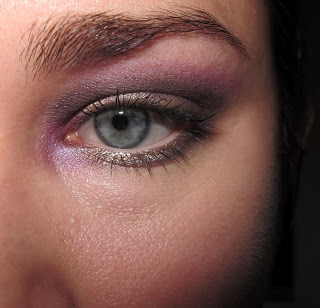
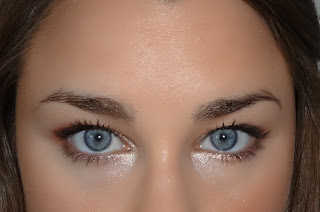
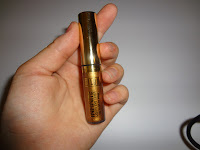
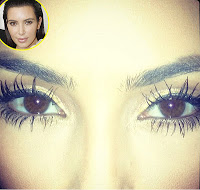
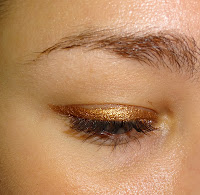
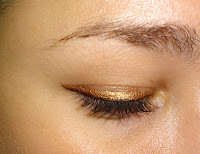
I have been seeing a lot of pictures lately in the media and on various blogs of girls wearing metallic eyeliner. Metallic eyeliner has also been advertised by different cosmetic companies this summer as well (Stila, Illamasqua, Milani ect.). Using liquid eyeliner is a quick way to get a fun makeup look without much hassle. Typically we see black or brown liquid liner, but when the eyeliner is colored or shiny, it adds even more to the overall look! Liquid liner is one of those things that takes a little bit of practice, but once you get the hang of it it becomes very easy and takes very little time to do. Bronzey makeup is very "on trend" this summer, so I thought it would be a great time to try this metallic liner ! I was also inspired by Pixiwoo's (on youtube) "easy bright summer eyeliner". I found a gorgeous golden eyeliner by Milani at CVS for about $6.00 in the color Forever. It is more of a bronze than a golden tone, but I really like the look of it on the eye. You can simply apply the liner to the eye and leave it at that. Or, you can apply the metallic eyeliner and then apply a thin line of black liner over the metallic, close to the lash line, for added definition. This way, you get a hint of shine, but it is much more subtle and understated. The pictures below show you the way it looks with just the metallic eyeliner, and also with the black liner over top. Note with the Milani eyeliner, you need to wait 10 seconds or so after applying it before you open your eye or it will transfer to the upper lid :-)

Even Kim Kardashian is wearing it!
How do you guys feel about this trend, would you try it?      
                                                                                              
Metallic eyeliner only


Metallic eyeliner with black eyeliner overtop

Sunday, July 15, 2012

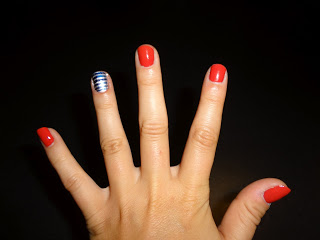
NOTD: Nautical

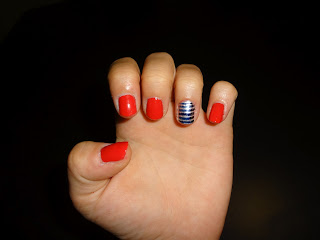
Nicole by OPI: Strike a Pose (Red)
Essie: Pearly White
Sally Hansen Complete Salon Manicure: Navy Baby (Stripes)

*Use a small paint brush to create the stripes! :-)*


Friday, July 13, 2012

DIY CAVIAR MANICURE!

Have you seen the latest "caviar" nails trend? The brand Ciate released a very fun and different nail design kit using tiny glass beads resembling caviar. I am always up for trying new trends, but at $25.00 for the kit, it just wasn't worth the price. So I decided to try a DIY caviar-esque manicure with a much cheaper price tag! All of the products needed for this manicure you will already have except for the beads.


Things you will need: 
-Recollections Microbeads from Michael's Craft Store: $3.99
-Nail color that matches bead color
-Clear Polish

-Top Coat
-Container for the excess beads (I used the top of my Birchbox :-) )


Step 1: Paint nail and coat it with clear polish


Step 2: While clear polish is still wet,
pour microbeads onto your nail; be sure to cover the whole nail!

Step 3: Paint over the beads with a quick drying top coat

 
Step 4: Pour excess beads back into the container!


Your done! Enjoy :-)

Thursday, July 12, 2012

NOTD: Aquamarine

Absolutely LOVING this color that I got in my Birchbox! This is Color Club Blue-Ming. Unfortunately the formula is very gooey which makes application tricky, but the gorgeous color makes up for it!